Saturday, February 22, 2014

Surprise Giveaway! Win the KBShimmer Blogger Collection!

My nail room has gotten pretty untidy and unorganized over the last couple of months, which is actually quite unusual considering I'm typically really anal about how it looks in there. Nevertheless, when I was cleaning in there today I came across an extra set of the KBShimmer Blogger Collaboration Collection (see my review/swatches here) that I meant to give away ages ago! So I guess my recent untidiness will be beneficial to you folks!


It's a pretty standard giveaway, so I'm sure you all know what to do. Rules and all that stuff are down below in the Rafflecopter widget.

a Rafflecopter giveaway
Good luck!

Sunday, February 16, 2014

Nails by David 3.0

As promised, today my husband David will be guest posting here!

Once again, he came up with a nail art design, picked out polishes, and painted my nails for me. You guys seem to love his posts every year and it's always a lot of fun for us, so this has become a regular V-Day tradition for us!

Unfortunately our work scheduled conflicted this weekend so we weren't able to get this up for the 14th, but it was just as much fun nonetheless!

Take it away, David!
__________________________________________________________________________

Hello everybody!
It's that time of the year again, when I get to embarrass myself online using nail polish as my medium.


This year, based on the fact that Kayla and I are married, I decided to have a wedding inspired V-Day nail design. I considered at first drawing to-scale portraits of the bridal party on each nail, but considering that may have been slightly beyond my skill level (just slightly), I was forced to reconsider this decision. So I said, "shag it, wedding rings it is!".


With the help of my beautiful wife, I located some polishes and went to work. I wanted there to be two rings on each nail, and maybe a heart in there too. I figured that too many hearts would muddy up the design, so I chose a simpler design, and decided on one heart on the accent nail.


I thought that it came out pretty decent! I wasn't completely disgusted!

I hope you guys enjoyed this. And remember: "Keep on…nail polish…art…doing…yeah…"

Thursday, February 13, 2014

Rose Nail Art for Valentine's Day

I have been so into floral nail art lately, so when thinking of a nail art design for Valentine's Day, my mind immediately went to roses. I've done a similar multi-rose print before, but this time I wanted to go a little more detailed and realistic with my design.


I started with China Glaze Bottoms Up on my thumb, ring and pinky nails and a simple black creme on my index and middle nails. Using a white creme polish, I freehanded on some irregular blob shapes over the black. Once that was dry, I filled in the white parts with Bottoms Up. While that was drying, I added the leaves using China Glaze Re-Fresh Mint accented by China Glaze Starboard and China Glaze Jolly Holly.

Once I finished the leaves, I went back to my blobs and started adding the details with Lime Crime Parfait Day followed by OPI I'm Indi-A Mood For Love. When everything was finished, I felt like the design was missing a little something, so I went back in with my white creme and the thinnest of dotting tools and added some white dots to the empty black space. To finish the design, I added a coat of Seche Vite to all of my nails.


I actually way prefer this rose design to my other one! I'm definitely going to have to experiment with some other colour combinations.


So, what are everyone's plans for Valentine's Day? Continuing with our tradition, David will be guest posting here with another of his hilarious manicures. If you haven't seen them, check out his 2012 post here and his 2013 one here.


Thanks for stopping by!

Monday, February 10, 2014

piCture pOlish Douceur by Tartofraises

I'm slowly working towards my goal of owning every piCture pOlish Collaboration shade. There's still quite a few I need to get my hands on, but one day they will all be mine. The one I'm showing you today is Douceur which was created in collaboration with the French blog Tartofraises.


Douceur is a nude-pink jelly base with fuchsia and magenta hex glitters and the classic piCture pOlish holo micro flakes.


Douceur was more opaque than I expected; my swatch shows just two coats! The formula was on the thick side and though it's not difficult to work with, I do advise patience during application.


I love that from afar, Douceur looks really delicate and muted, but up close you can definitely see that there's a lot going on with this shade. I know I say this about pretty much all of the piCture pOlish Collaborations, but this one is for sure another favourite of mine.


piCture polish Douceur is available from the piCture pOlish website as well as from other global network members such as Harlow & Co. and Nail Polish Canada. Be sure to check out their list of network members to find an etailer nearest you.

Friday, February 07, 2014

Herringbone & Studs - OPI Gwen Stefani Nail Art

OPI's celebrity partnerships have been some of my favourite collections over the years, so I was really excited when I heard they were collaborating with Gwen Stefani! I picked up the whole collection last week and was immediately inspired to use the shades to create some funky nail art. I'd also been saving this design by Manicurity in my inspiration folder for a while now so I thought these colours would work perfectly in this design.


I painted my thumb, index and pinky nails with OPI Over & Over A-Gwen, which is a rich classic red creme. It's not the most unique colour, but I don't think a Gwen Stefani Collection would be complete without a great red, and this one definitely qualifies. It even comes in a collector's box with Swarovski crystals and studs. I didn't actually use the studs from the box in the mani because I have a weird thing where I want to save special edition items, so I just used some gold studs I bought from eBay.

For my ring nail I used OPI Love. Angel. Music. Baby, which is a shimmering gold with a satin finish. I added top coat to this nail in order to tie in with the shiny finish on the rest of the nails, but it's also gorgeous in its normal finish.

For the herringbone nail, I started with a base of OPI Alpine Snow. When that was basically dry, I freehanded on the herringbone pattern using a thin nail art brush and OPI 4 in the Morning, which is a shimmering black that also has a satin finish.


I'm really into the herringbone pattern right now so I think I'll have to experiment with using different/more colours and variations.


Thanks for stopping by! Have a great weekend!

Monday, February 03, 2014

Delush Polish XO Valentine's Day Collection - Swatch & Review

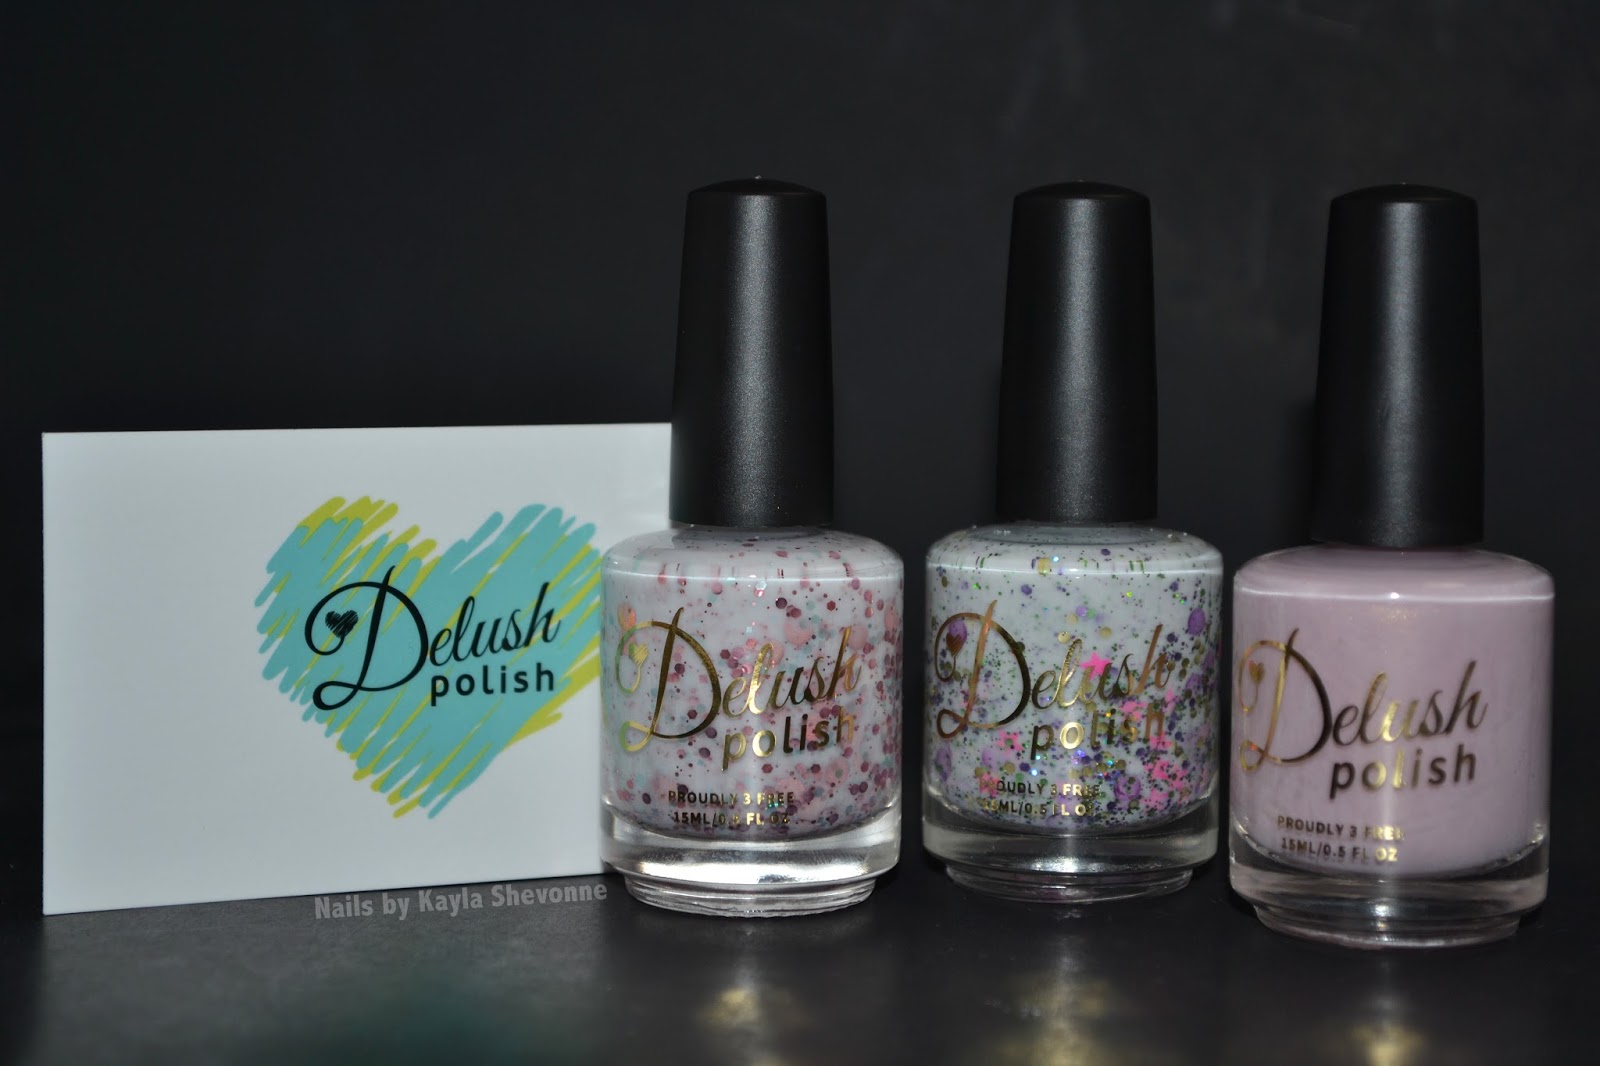
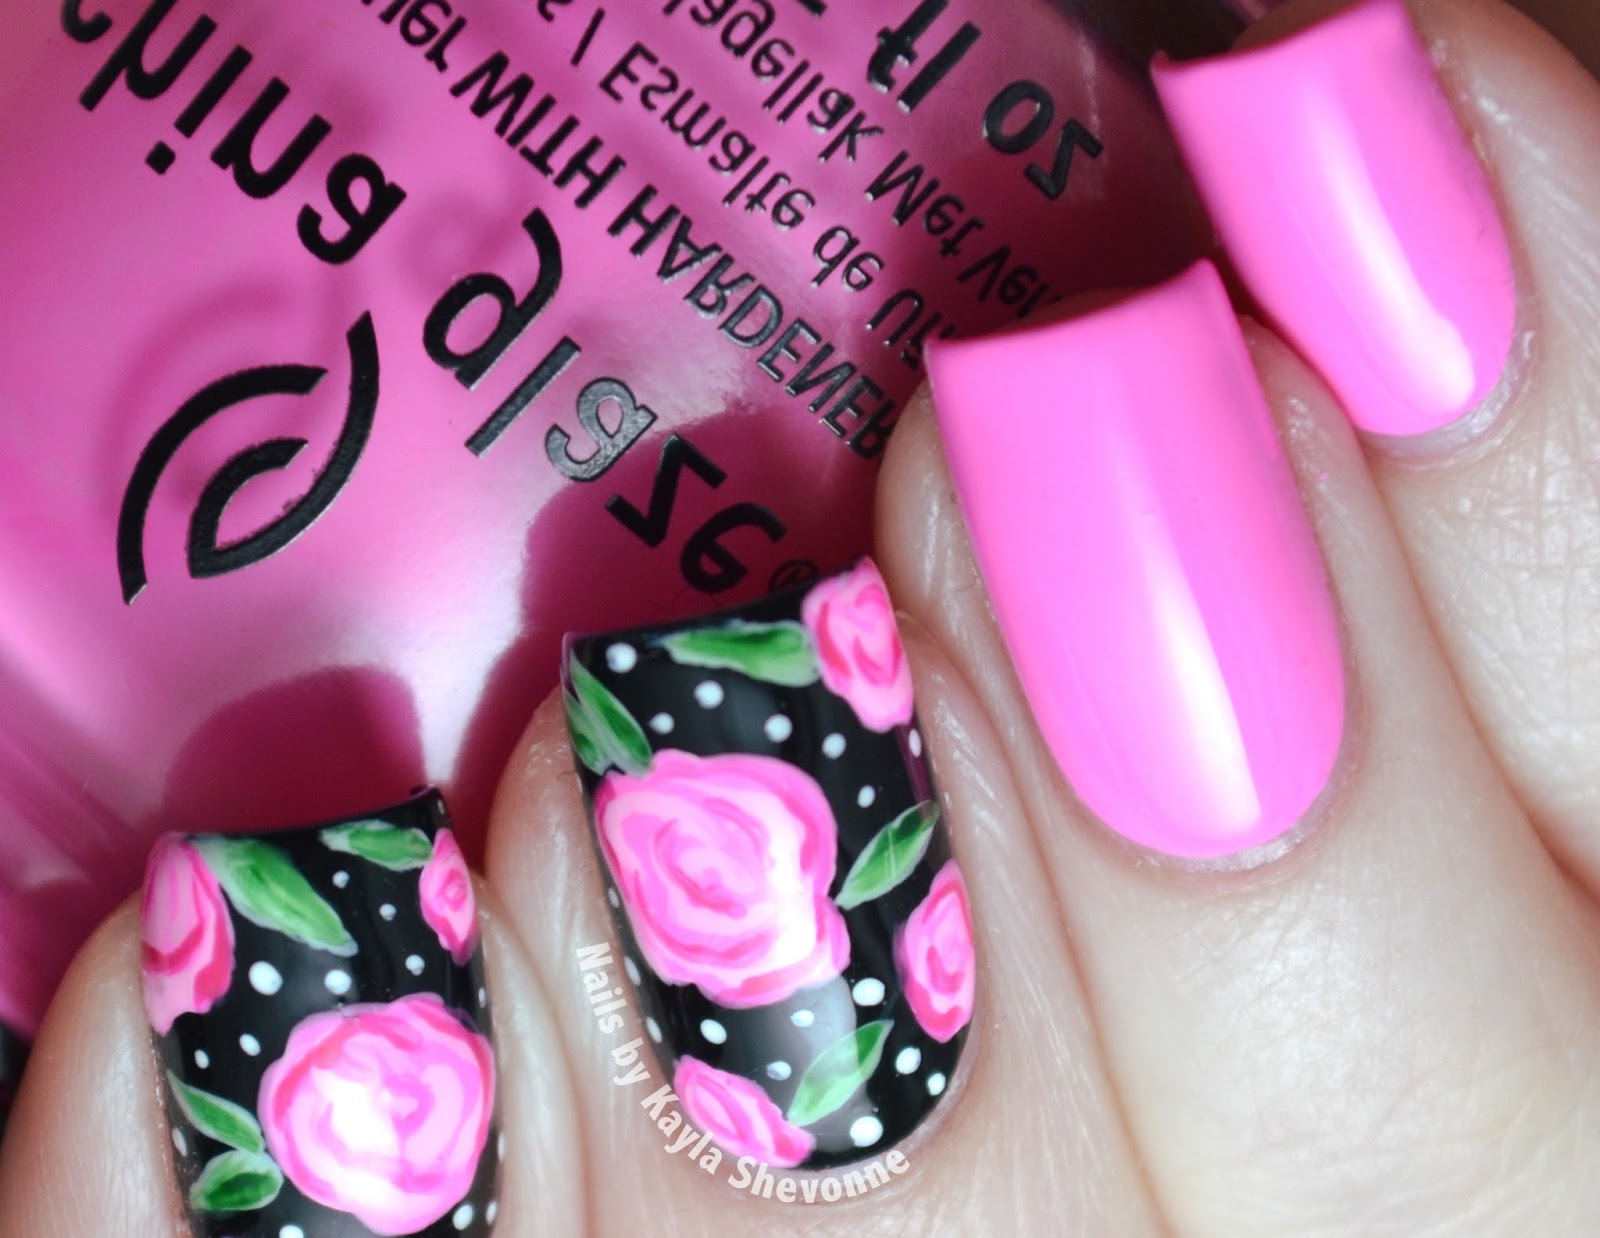
Just in time for Valentine's Day, Delush Polish is offering the XO Collection - a trio of romantic polishes that are sure to set the right mood for V-Day!


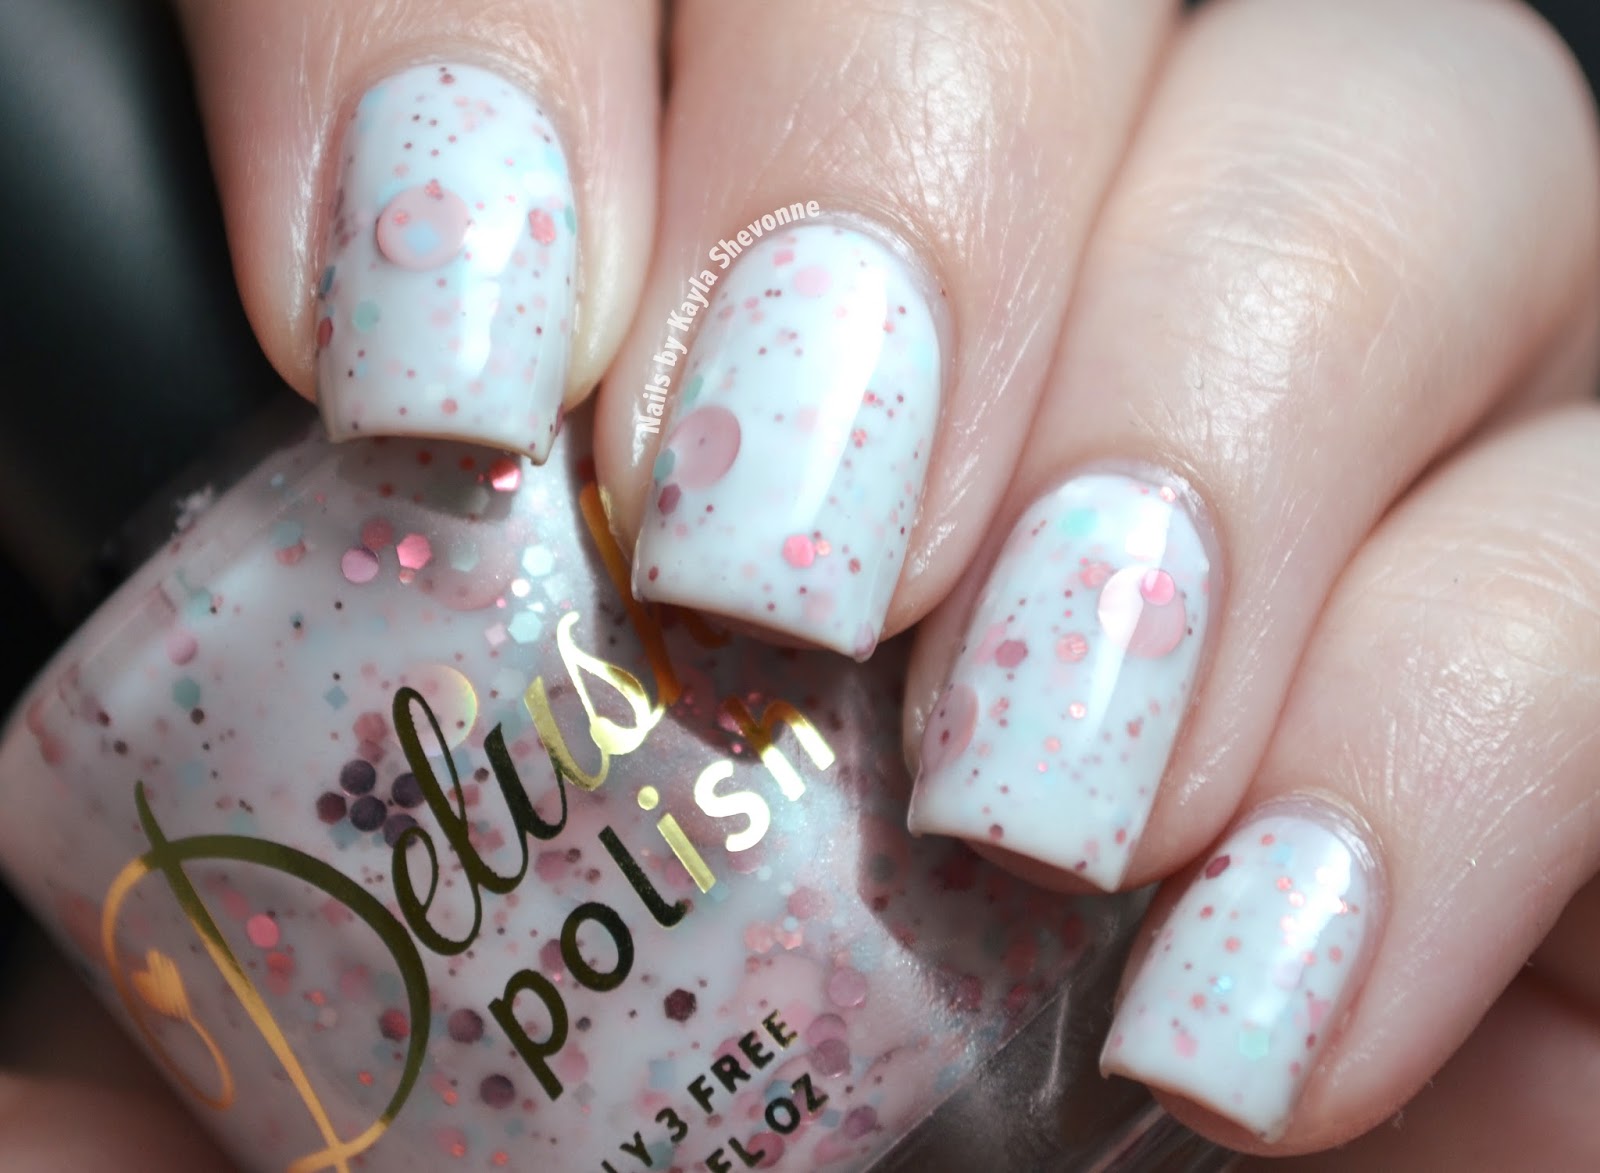
Je Ne Sais Quoi is a soft white crelly base with a mix of blue, pink and white glitters throughout. The glitters range in size and shape - there's squares, hexes and circles. It had a good, thick formula that covered nicely in three coats. I did have to do some fishing with my brush for the larger circle glitters, so keep that in mind during application.

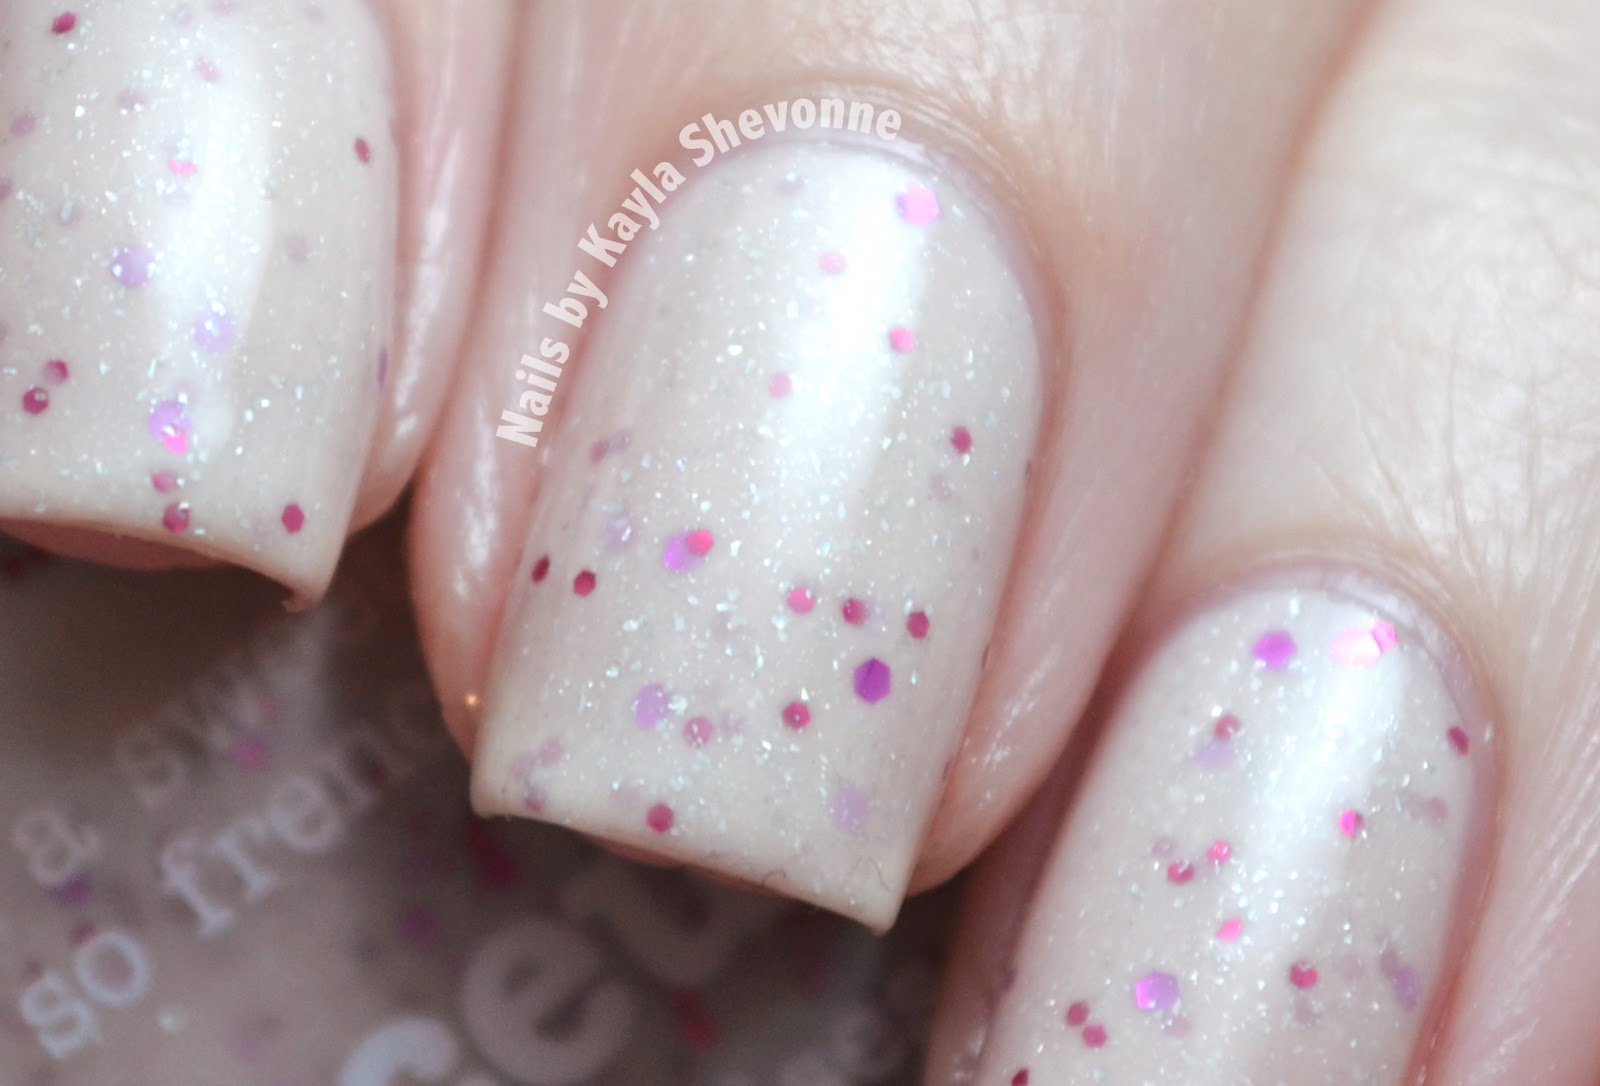
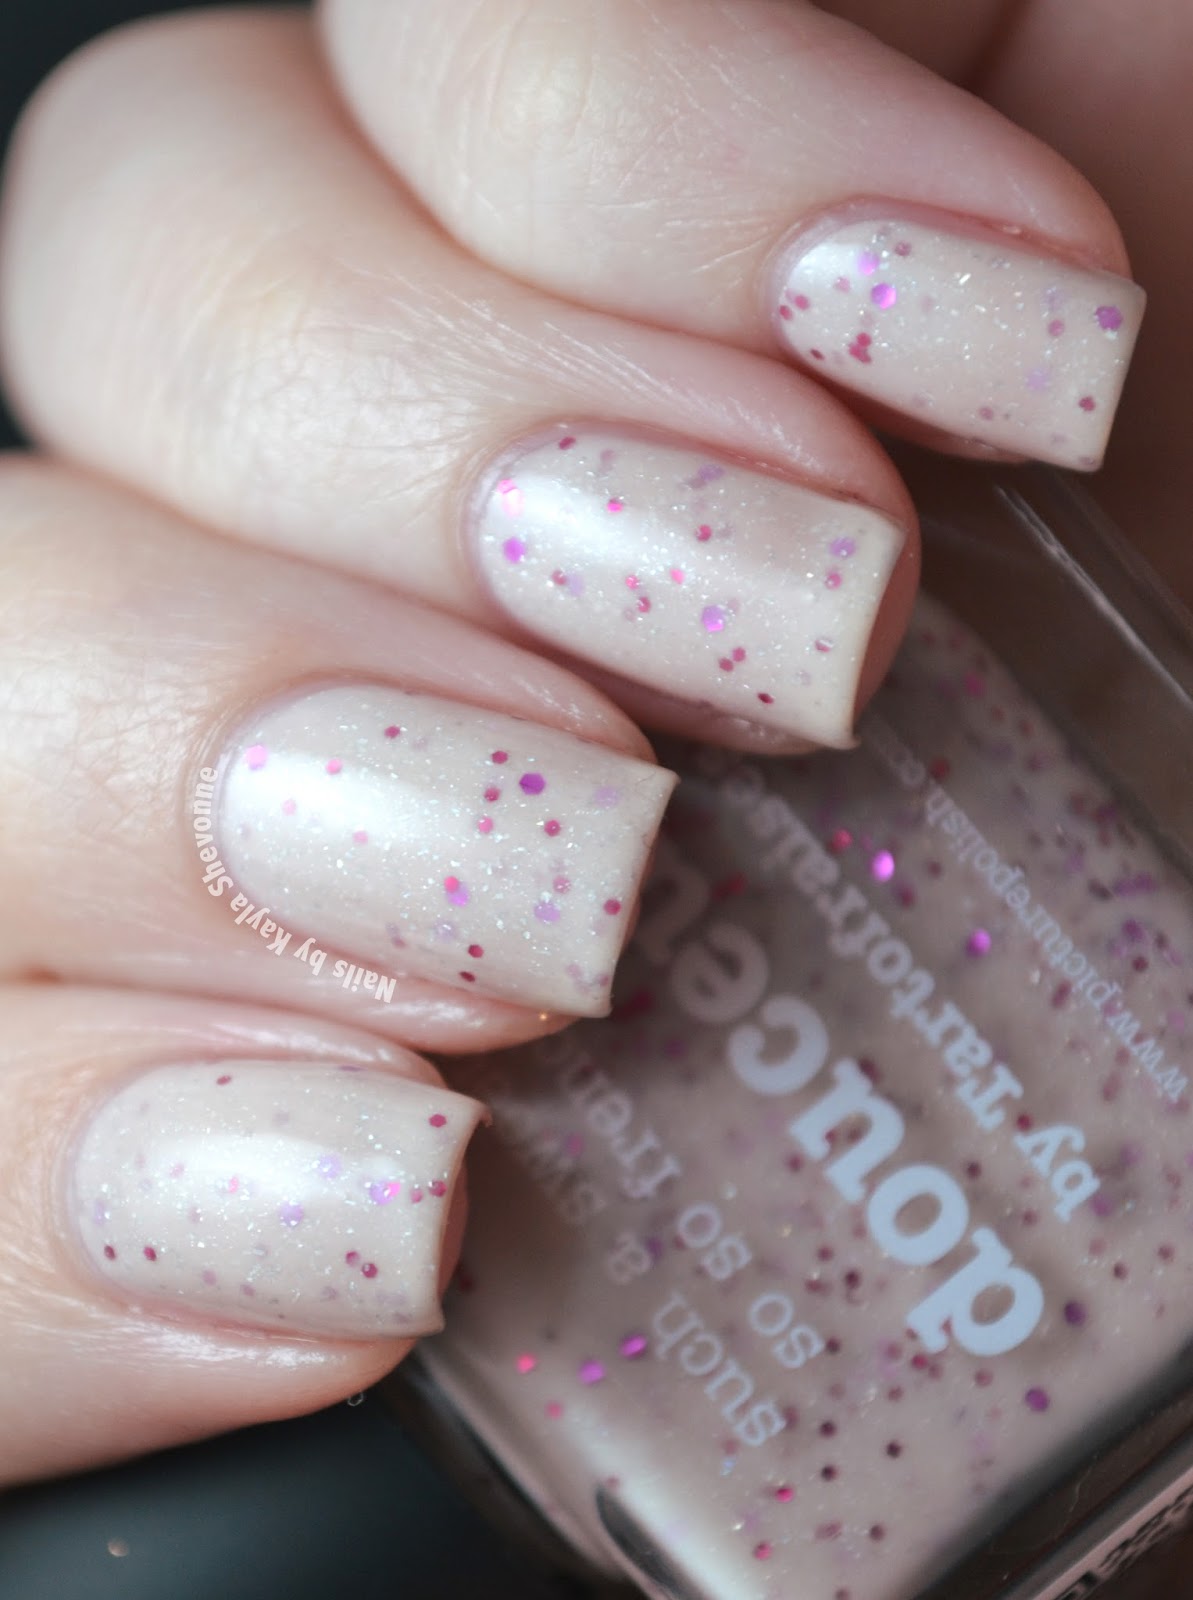
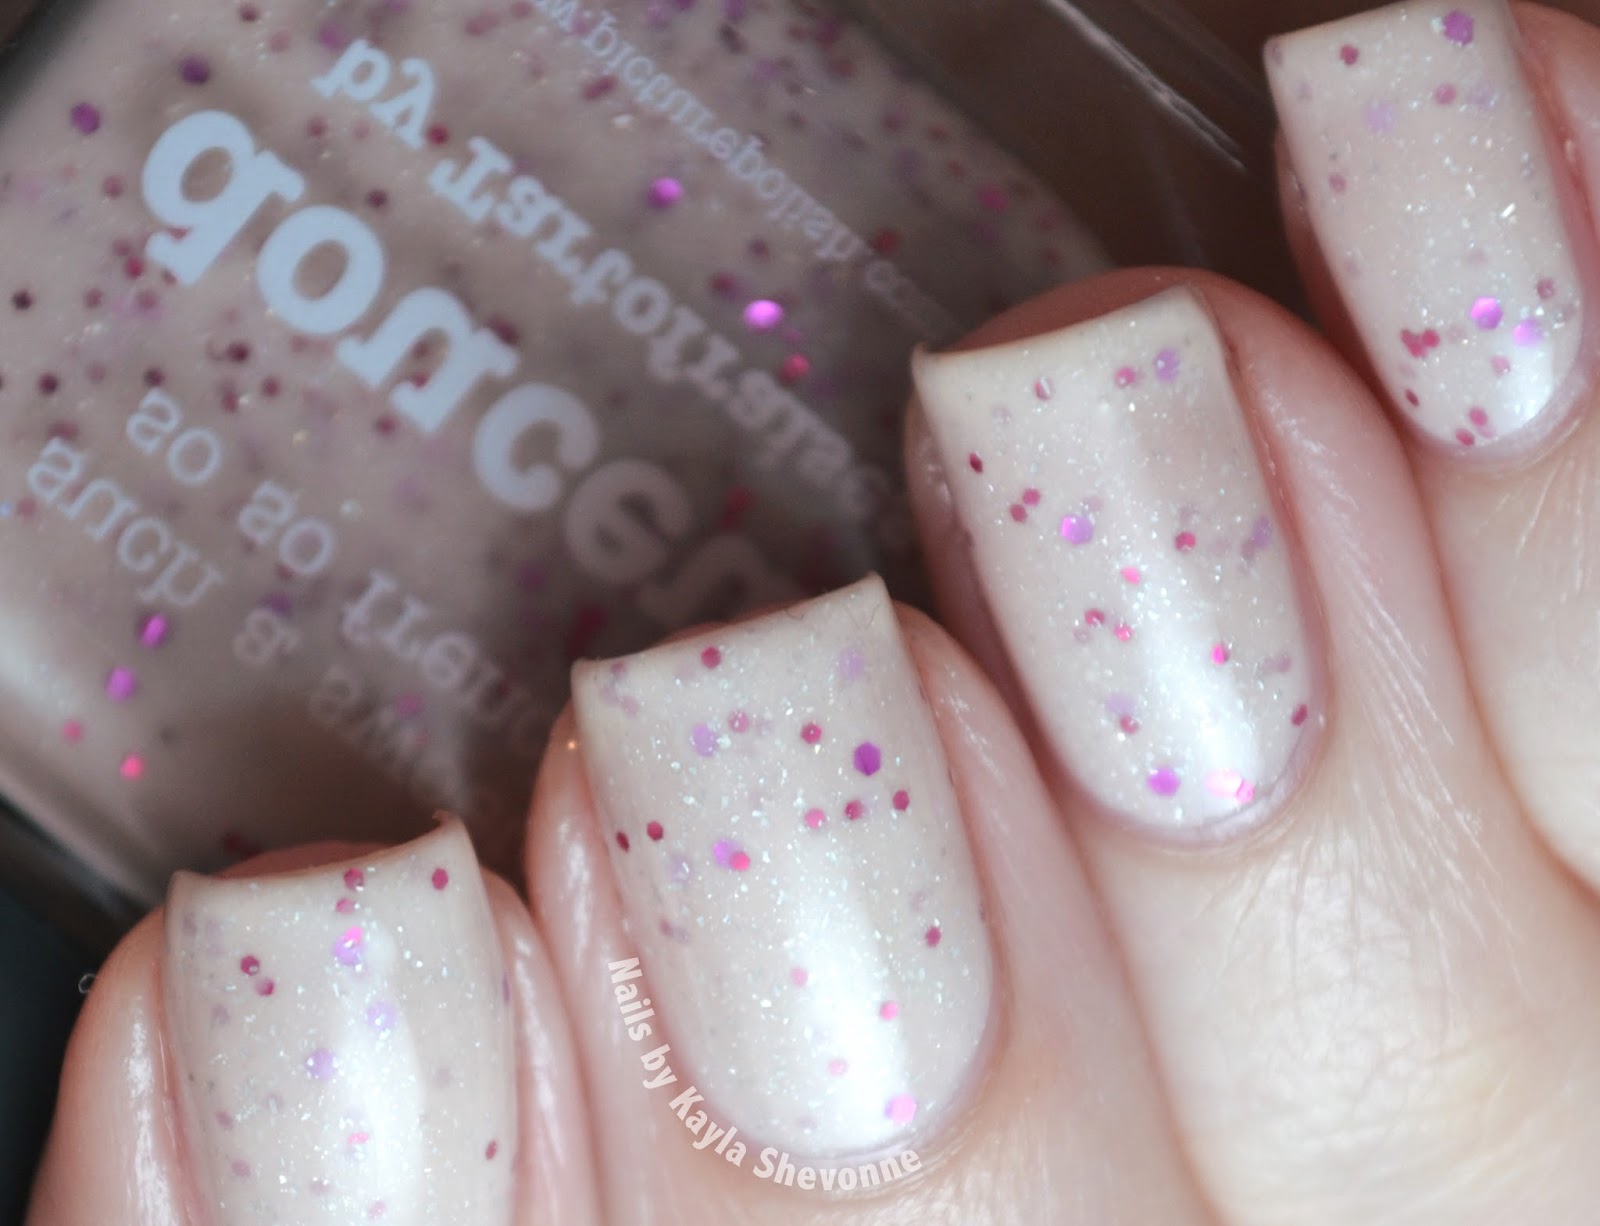
This one is my favourite of the trio! I love the soft milky base and the beautiful rosy pink glitters. I think this could also work for a baby shower!


Lights Out is a crisp white crelly base packed with gold, priple, pink and green glitters. Again, the glitters range in size and shape. There's circles, stars and hexes. The base is more opaque than I expected so it's easy for some of the glitters to hide away when they're covered with a new coat. This one also had a nice, thick formula. The hot pink start glitters were plentiful and I didn't have to fish at all to get an abundance of those, but I did have to fish for the larger purple circles. I've shown three coats here, but you could definitely get away with two.

This one is interesting to me because it somehow manages to be both a colourful glitter bomb, while still remaining soft and delicate. I'm impressed.


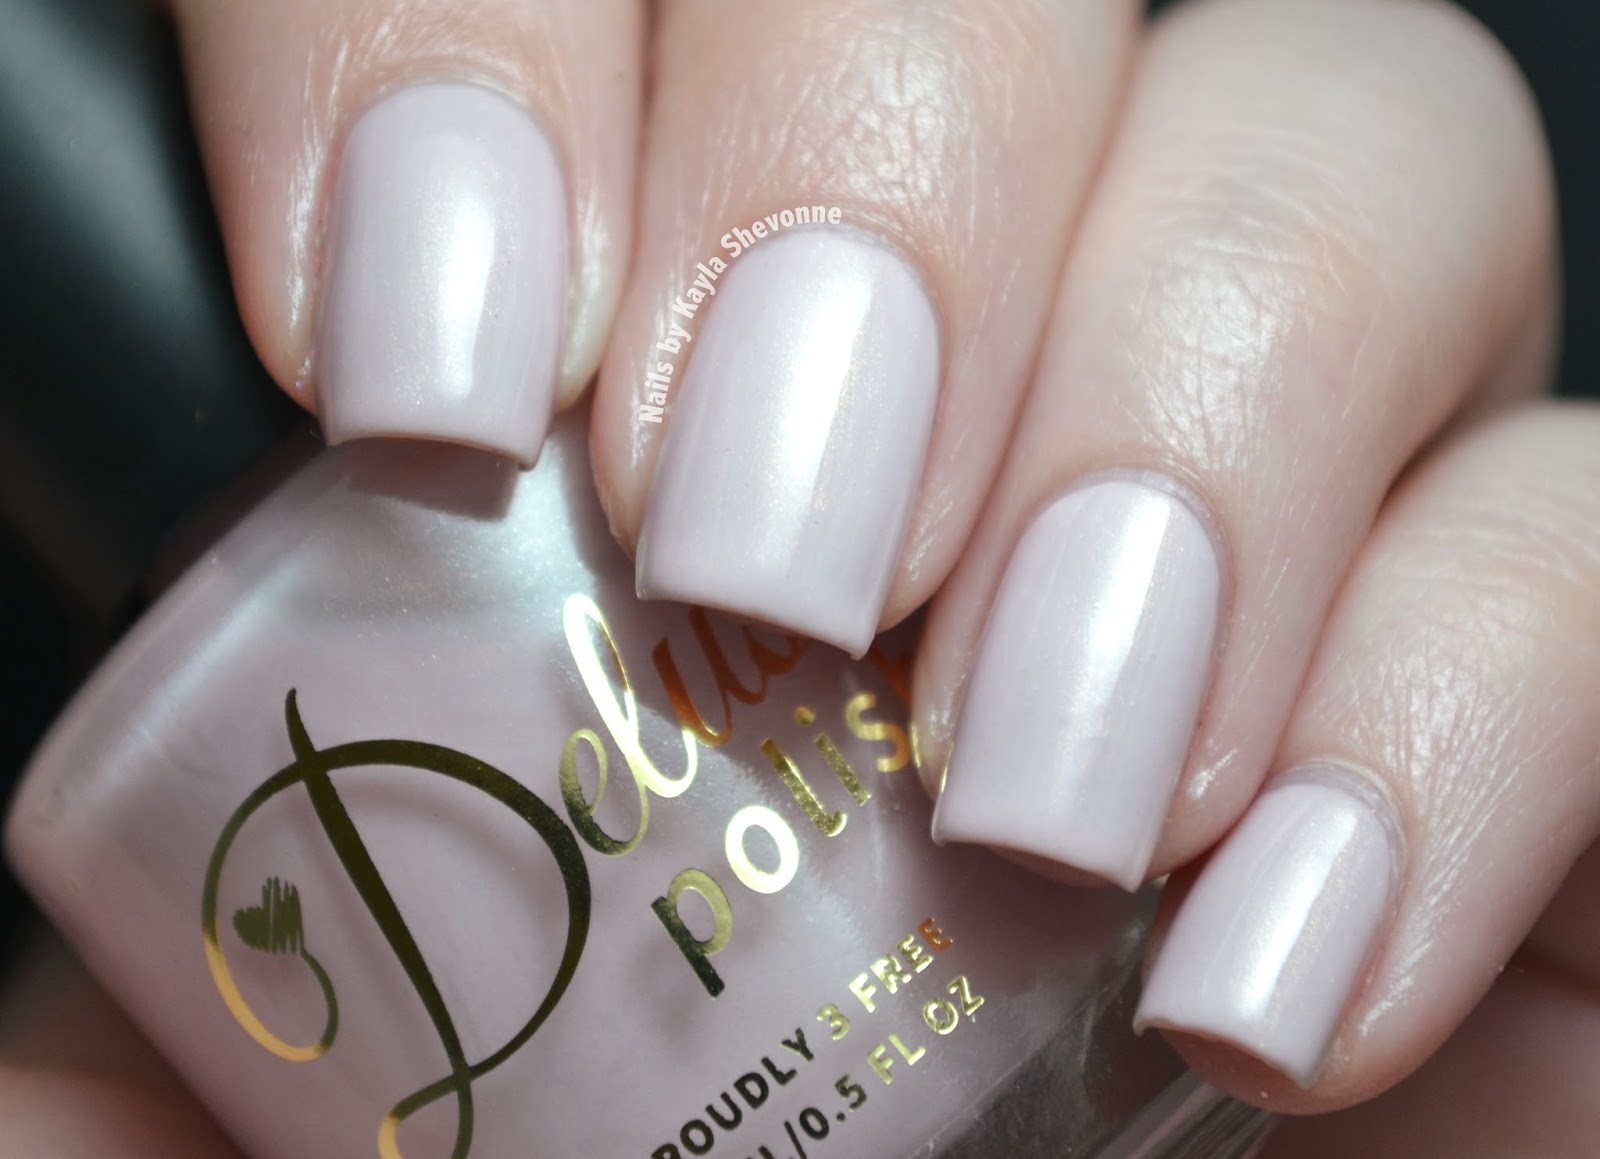
Make Me Blush is a very light blush pink with golden shimmer. The formula applied great, though it was a tiny bit streaky on the first coat. I used three coats in total here, but you could get away with just two.

Make Me Blush is very delicate and feminine, and definitely office appropriate. What I like about it personally is that it's so delicate that it almost borders on nude, which I find actually works better with my skin tone. I definitely don't have any pinks quite like this in my collection.


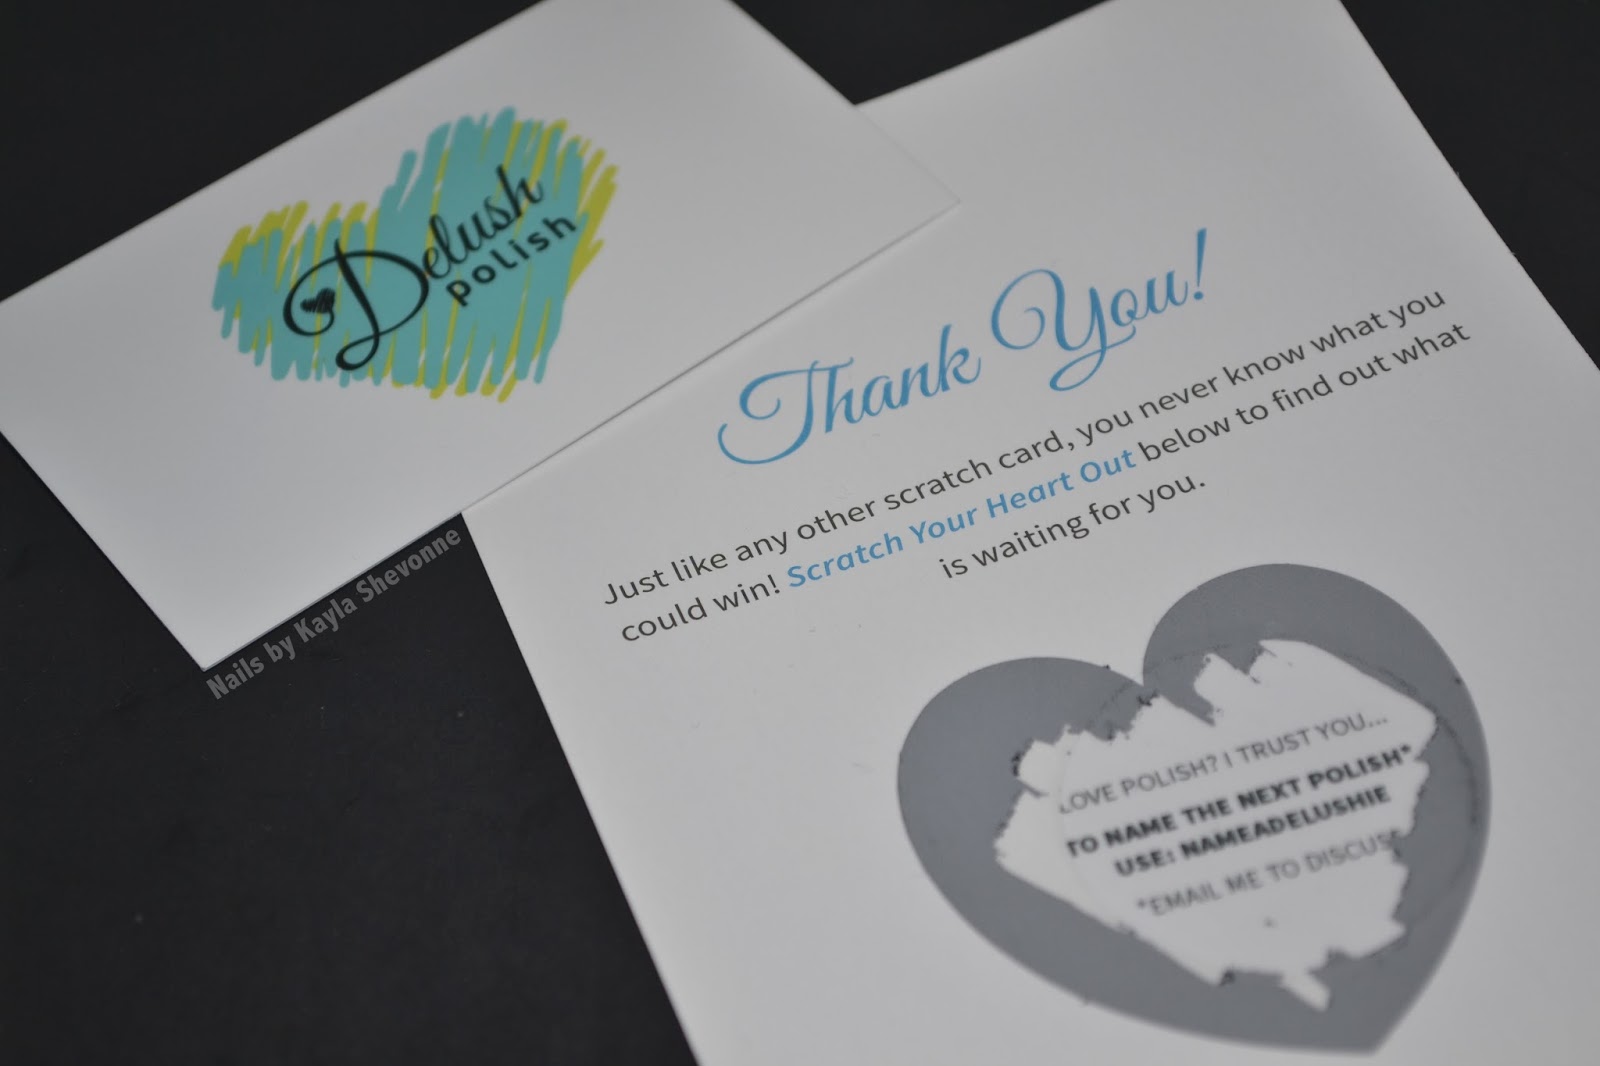
I should also mention that with Delush Polish orders you get a fun scratch card! Mine gives me the opportunity to name a new Delush Polish shade, which is pretty darn cool.


My first experience with Delush Polish was definitely very good and I hope to try out more shades from the brand in the future!

You can find the XO Collection and other Delush Polishes from the online store here. You can also follow the brand to keep up with the latest news and collections!

Newer Posts Older Posts Home