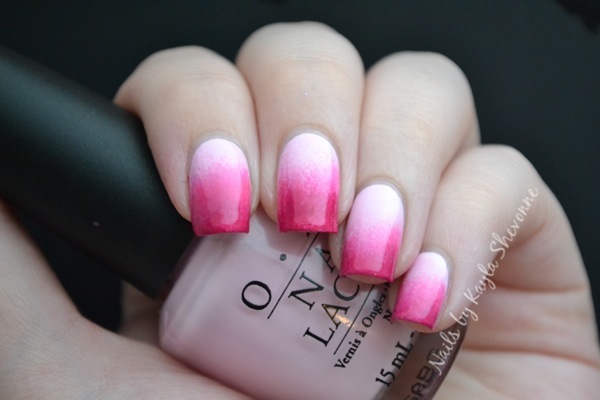
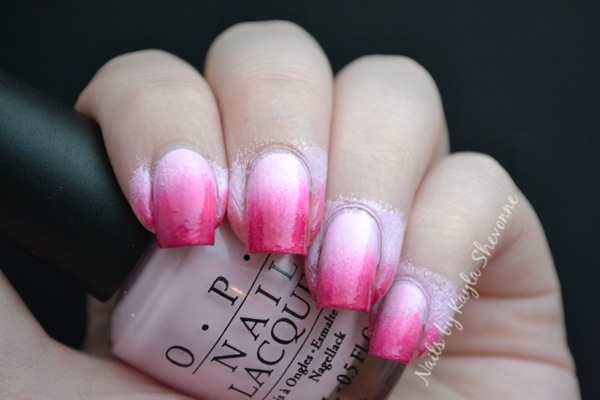
You all seemed to really like yesterday's challenge mani! Thank you for all the lovely and kind comments that you left for me - I truly appreciate each and every one of them.
I also received several emails asking how I did such smooth gradients as the base for the design, so I decided that the best way to explain it would be through a picture tutorial!
Keep reading for the step-by-step tutorial!
Supplies:
- Base and top coat
- Two or more polishes (I'm using ones from the same colour family, but that's not necessary)
- A makeup sponge
Step 1:
Apply your base coat.
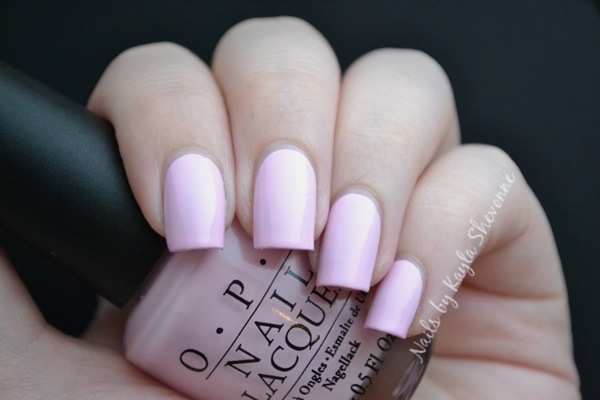
Step 2:
Paint all of your nails with the lightest of the colours you chose. Wait for that to completely dry (use a fast drying top coat if you want to speed this up).
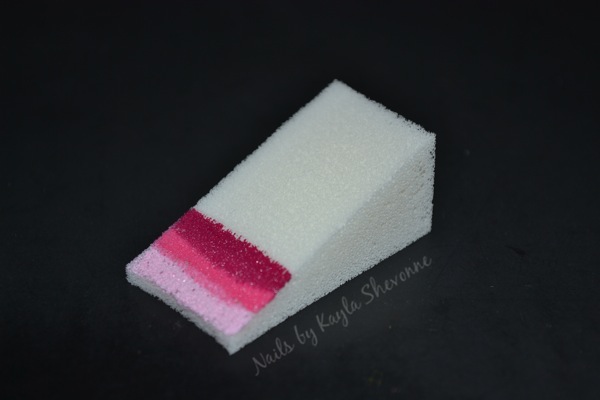
Step 3:
In the order that you want the gradient to appear on your nails, paint your sponge with all of the polishes, including the one that you used as your base colour. Make sure that the colours overlap just slightly.
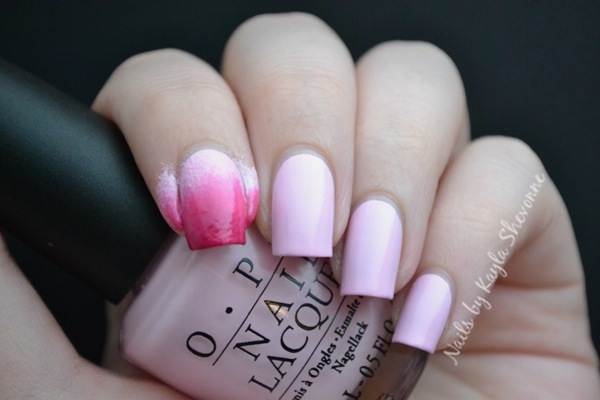
Step 4:
Dab the sponge lightly onto your nail several times. While dabbing, use a very slight up and down motion in order to blend the colours together. Repeat steps 3 and 4 until you get the colour pay-off that you desire.
Step 5:
So now you've got a big ol' mess on your fingers. Clean that up with a couple of q-tips and some polish remover.
Step 6:
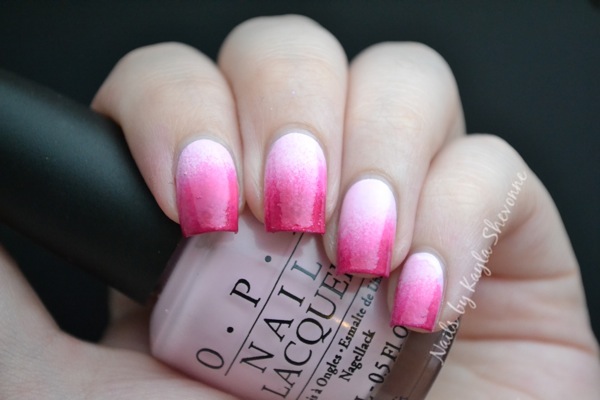
After allowing your gradient to dry, add a layer of your favorite top coat. This will make your new mani last longer, it will smooth out any bumps that have been created during the process, and it will also give your nails a nice shine. As well, the top coat will blend the gradient even more, so it's a must for gradient nails.
A few tips:
- Don't throw your sponge away after only 1 use! You can use all sides of the wedge, so save it for a later gradient mani!
- Use inexpensive sponges. I had been using a high-quality brand of makeup sponges for a while and the results just weren't the same. The brand I have now is from Wal-Mart, the package comes with 30 sponges and it was only about $2.
- If you're just starting out with gradients, choose colours that are just a couple of shades off from one another. It's better to start off slow and ease your way into the more bold and contrasting gradients (for example: a black and white gradient).
Gradients look awesome on their own, but you can obviously add some stamping or freehand nail art over your gradient base to really take it up a notch!
Thanks for reading!
thanks for the tute!
ReplyDeletebeautiful colors!
ReplyDeleteThank you so much for this tutorial!! I can never get a smooth transition of colors but this will definitely help me out now!!! Thanks!!!
ReplyDeleteThank you, I really appreciate every single tutorial I see. I've got so much to learn!
ReplyDeletenice!
ReplyDeletegreat! *_*
ReplyDeletefantastic gradient!
ReplyDeleteI love this I literally just saw one very much like this on twitter!
ReplyDeleteJazz x
Thanks so much for the tutorial! I can't wait to try this out later today :)
ReplyDeleteGreat tutorial! I realize now that I was doing it wrong b/c I wasn't using my base color on the sponge and it wasn't turning out right. Thanks for the step-by-step!
ReplyDeleteAwesome!
ReplyDeleteOh I wish mine would turn out that smooth! I did everything you said I swear! Need more practice I guess. What colour is that OPI polish? It's so pretty :)
ReplyDeletei love doing gradient nails and it's super cute using different shades of pink, i'll definitely be giving this a go!
ReplyDeleteThis Beautiful!
ReplyDeleteAwesome work. Nice nails. Thanks for posting.
ReplyDeleteThanks for cool stuff. I like it.
ReplyDeletewritten essays
whenever i use a make up sponge the sponge just soaks up all the polish so i can't apply to nails...( foundation sponge ) would you recommend a particular type of make up sponge? thanks :)
ReplyDelete