I'm cutting it close, but I think I've got time to squeeze in one last Christmas tutorial! Can you believe that Christmas is just a little over two days away? This year has gone by so fast!
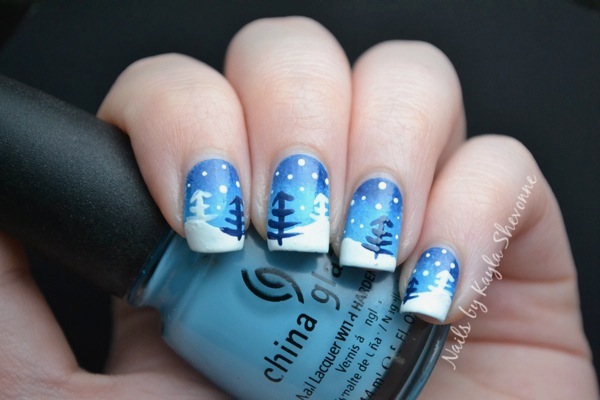
This tutorial is for my Winter Wonderland design that I posted a couple of days ago. It's actually quite easy, just a little time consuming.
Keep reading for the tutorial!
Supplies:
- Base and top coat
- Three shades of blue creme polish: dark, medium and light
- White creme polish
- Makeup sponge
- Black dotting tool (you could use a toothpick if you don't own dotting tools)
- Small nail art brush
Step 1:
Apply your base coat.
Step 2:
Paint all of your nails with your lightest shade of blue.
Step 3:
After allowing your light blue polish to dry, follow the steps in my gradient tutorial to create a smooth gradient using the three shades of blue. The darkest shade should be near your cuticle and work down to the lightest shade at the tip.
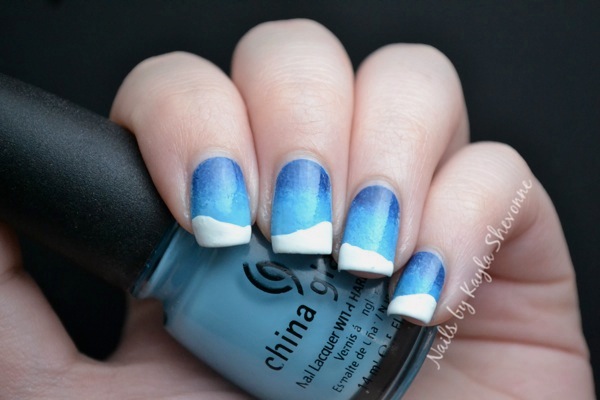
Step 4:
Using your nail art brush and the white polish, create snowy mounds at the tips. Don't worry about the shapes being perfect because they should be irregular - just like fallen snow!
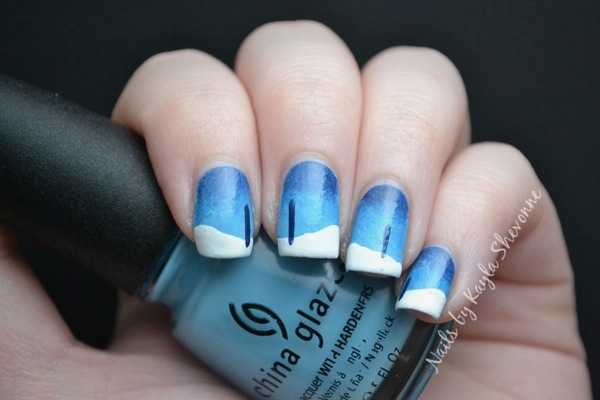
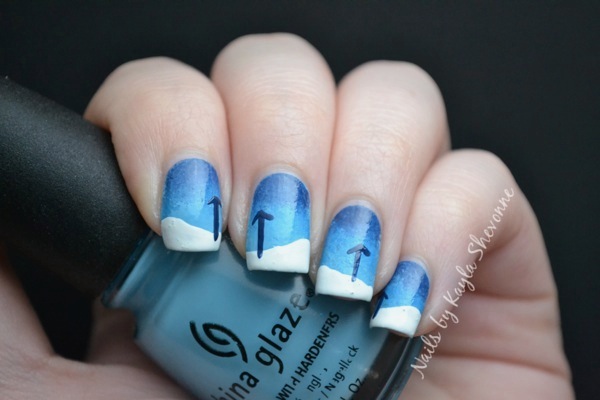
Step 5:
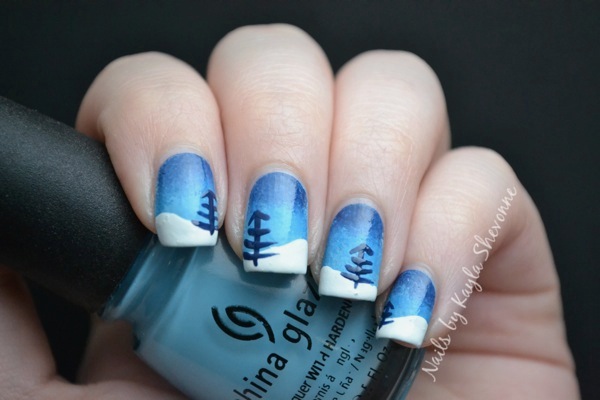
To create the trees, first start with a small vertical line. Add an arrow shape at the top. Then, working your way down the length of the tree, draw horizontal lines to create branches. As you work your way down to the base of the tree, the horizontal lines should continue to get longer. If you wish, you can curve your branches slightly upwards like I did, but you might find it easier to just create straight lines, which is also fine.
Step 6:
Using your small dotting tool or toothpick, add some dots in the empty space around the trees to simulate falling snow.
Step 7:
After allowing your design to dry, add a layer of your favorite top coat. This will make your new mani last longer, it will smooth out any bumps and ridges that have been created during the process, and it will also give your nails a nice shine.
I hope this tutorial was helpful! And if you try this design out for yourself, be sure to share it with me on the ! Or, share in on Instagram and tag me in your post!
Thanks for looking!
These are awesome! I love it!
ReplyDeleteThank you so much for this tutorial! I will be trying these sometime this winter for sure!
ReplyDeleteCute :)
ReplyDeleteSo simple yet so awesome! I love the tree design! :)
ReplyDeleteLove!! ❤
ReplyDeleteI just love this, thank you for the tutorial!
ReplyDeletelovely manicure. I just noticed your peacock in your header, that is awesome! :)
ReplyDeleteI love your tutorials, thank you so much! And merry Christmas!
ReplyDeleteStunning mani <3
ReplyDeleteI love tutorials !
xxx
looks amazing :D
ReplyDeleteYou are amazing!
ReplyDeletethis mani is wintery perfect. :)
so beautiful! I'd like to recreate it :)
ReplyDeleteVery cute!!
ReplyDeleteSo simple, so beautiful thank you for showing us how to do it! H.C. :)
ReplyDelete<3 <3 <3 <3
ReplyDeleteWooooooow, it is a very simple mani but the final result is gorgeous! <3
I love very much this nail art, has long been I follow your blog and I think your creations are very beautiful and original .. this is one of my favorites, really beautiful :-)
ReplyDelete