As some of you may have seen, yesterday I posted on twitter that for the first time in a very long time, my to-swatch bin is completely empty! I felt pretty good about that!
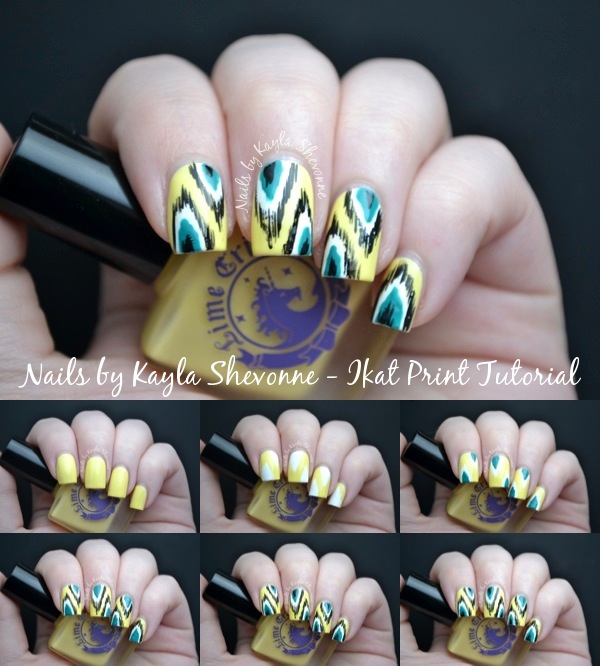
So without anything to swatch right now, I figured I'd get to work on some tutorials for you! The one I'm starting with is my Ikat print design, which I've shown you before both here and here. It's super easy as long as you have the right materials, so I encourage everyone to give this one a try!
Keep reading on for the step-by-step tutorial!
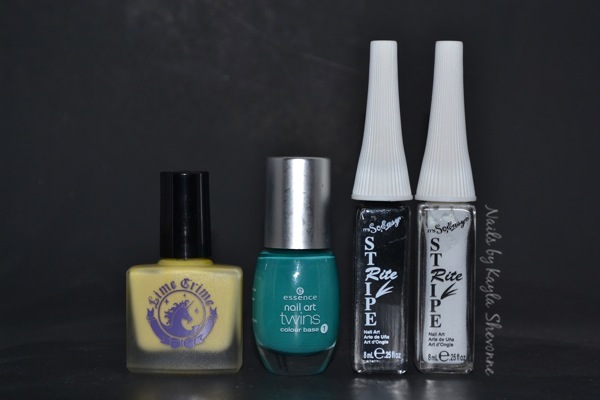
Supplies:
- Base and top coat
- Two polish colours of your choosing (I chose yellow and teal today, but as you can see below, I've done this design with several other colour combos)
- Black and white striping polishes (The ones I'm using are my go-to stripers from the It's So Easy brand, which can be found at Sally Beauty Supply)
Step 1:
Apply your base coat.
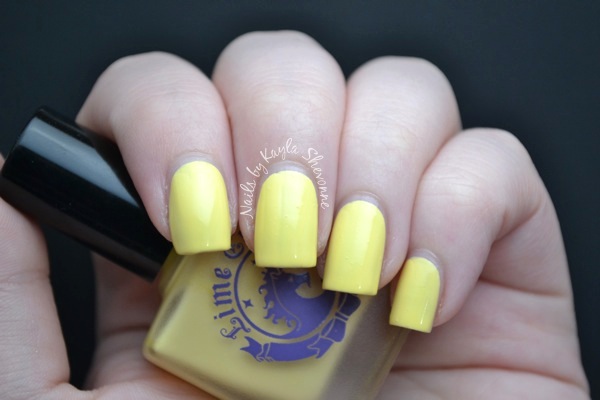
Step 2:
Paint all of your nails with whichever polish you chose as your base colour.
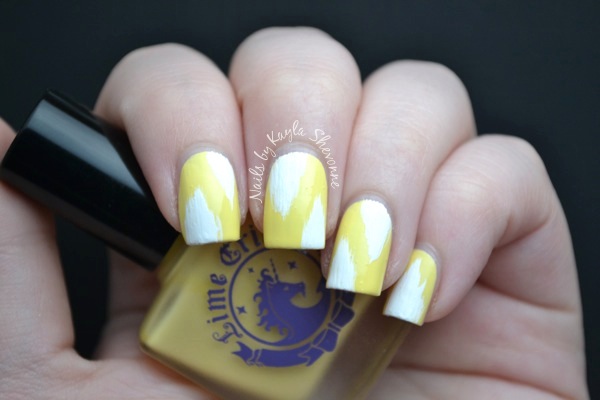
Step 3:
After allowing your base colour to dry, take your white striping polish and create one or two irregular triangle shapes on each of your nails.
Step 4:
Using your second colour, place a small amount in the middle of all your white triangles. Follow the general shape of the white triangle, but don't try to make it too perfect - the irregularity of these shapes is what makes this print look so cool in the end.
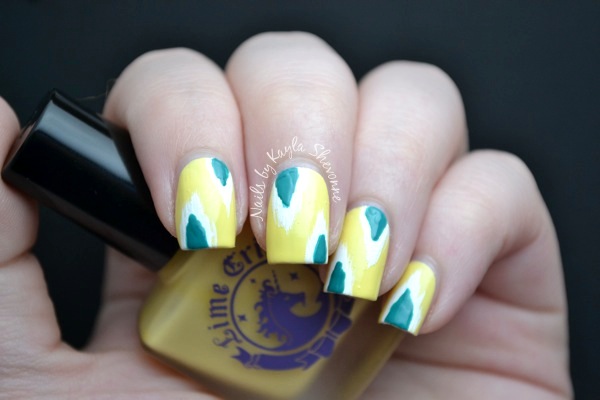
Step 5:
Now using your black striping polish, you want to outline your white triangles. Be careful not to make the outline too thick as you still want to see the white underneath. The key to this step is to make sure there's not too much polish on your brush and use slight flicking motions with the striper in order to create wispy edges.
Step 6:
Still using your black striping polish, add a touch of black to the second colour you used above (for me it's the teal). The black doesn't need to be any particular size and it doesn't need to be perfectly centred. Again, the irregularity of this mani is what makes it awesome.
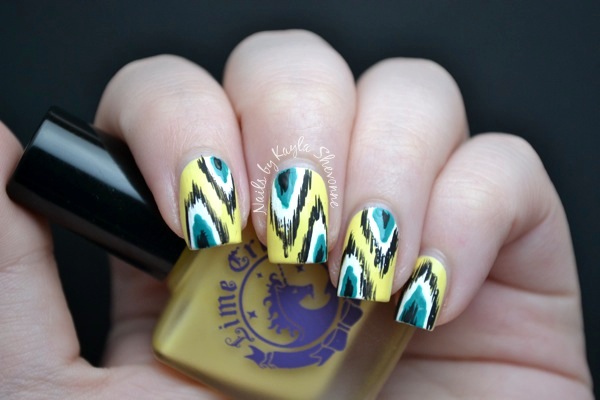
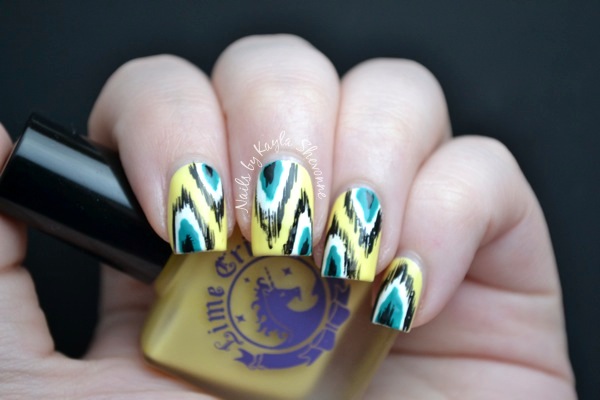
Step 7:
After allowing your design to dry, add a layer of your favorite top coat. This will make your new mani last longer, it will smooth out any bumps and ridges that have been created during the process, and it will also give your nails a nice shine.
The design is really versatile, so you can switch up the colours to better suit your own personal style! Here are two other colour combinations that I've done in the past:
I hope this tutorial was helpful! And if you try this design out for yourself, be sure to share it with me on the ! Or, share it on Instagram and tag me in your post!
Thanks for looking!
Nail art is one of the most favorite art of mine. I like applying this on my nails every day. I made some post for this art here.
ReplyDeleteGreat tutorial - I love the ikat design, too! I also love the colors you used, you've made me want to get the Lime Crime polishes, as I missed them when the first came out.
ReplyDeleteI LOVE this print - now I want to try it out :)
ReplyDeleteThey are so cuuute <3 absolutely love them and definitely gone try them.
ReplyDeletehttp://beautybymikaella.blogspot.ro
Beautiful, can't wait to recreate this bad boy!
ReplyDeleteI love it! I'm definitely going to give this a try tonight. :)
ReplyDeleteFinally! I have been waiting for you to do an ikat tutorial, yours are always so perfect :) will be trying this soon!
ReplyDeleteThank you for the tutorial! im going to try this out soon!
ReplyDeletex
Love these! This is one of the nicest ikat manis I've seen, love the colours. :)
ReplyDeleteThis is so pretty and thanks for the tutorial!
ReplyDelete♥ LOVE!! these are gorgoeus!!
ReplyDeleteI would love to Pin this tutorial but all I can get to pin is the final pic! I love this ! Do you have this tutorial pinned???I just found nails by Kayla and i think you do wonderful,absolutely beautiful work!!!
ReplyDeleteFound it!!! lol
ReplyDeleteabsolutely love this design! <3
ReplyDeletenice post
ReplyDeleteadclout.com