Sunday, March 16, 2014

I Don't Think You're Ready for this Jelly Floral Mani

I love this floral design from and I've been meaning to try my own version of it for quite some time now. If you're not already following Candice, you really should. She's incredibly talented, especially with floral designs. She's basically the queen of floral nail art imo.


Anyways, I wanted to go with a bright, yet slightly muted colour palette so I chose four of the jelly shades from the China Glaze Sunsational Collection - Are You Jelly?, Keepin' It Teal, Shell-O and Heat Index over a base of none other than OPI My Vampire is Buff


I won't go into details about the specific technique for creating the look since Candice has already posted a that you can follow. It's super simple and you really don't need any special nail art tools at all.


Thanks for looking!

Saturday, February 22, 2014

Surprise Giveaway! Win the KBShimmer Blogger Collection!

My nail room has gotten pretty untidy and unorganized over the last couple of months, which is actually quite unusual considering I'm typically really anal about how it looks in there. Nevertheless, when I was cleaning in there today I came across an extra set of the KBShimmer Blogger Collaboration Collection (see my review/swatches here) that I meant to give away ages ago! So I guess my recent untidiness will be beneficial to you folks!


It's a pretty standard giveaway, so I'm sure you all know what to do. Rules and all that stuff are down below in the Rafflecopter widget.

a Rafflecopter giveaway
Good luck!

Sunday, February 16, 2014

Nails by David 3.0

As promised, today my husband David will be guest posting here!

Once again, he came up with a nail art design, picked out polishes, and painted my nails for me. You guys seem to love his posts every year and it's always a lot of fun for us, so this has become a regular V-Day tradition for us!

Unfortunately our work scheduled conflicted this weekend so we weren't able to get this up for the 14th, but it was just as much fun nonetheless!

Take it away, David!
__________________________________________________________________________

Hello everybody!
It's that time of the year again, when I get to embarrass myself online using nail polish as my medium.


This year, based on the fact that Kayla and I are married, I decided to have a wedding inspired V-Day nail design. I considered at first drawing to-scale portraits of the bridal party on each nail, but considering that may have been slightly beyond my skill level (just slightly), I was forced to reconsider this decision. So I said, "shag it, wedding rings it is!".


With the help of my beautiful wife, I located some polishes and went to work. I wanted there to be two rings on each nail, and maybe a heart in there too. I figured that too many hearts would muddy up the design, so I chose a simpler design, and decided on one heart on the accent nail.


I thought that it came out pretty decent! I wasn't completely disgusted!

I hope you guys enjoyed this. And remember: "Keep on…nail polish…art…doing…yeah…"

Thursday, February 13, 2014

Rose Nail Art for Valentine's Day

I have been so into floral nail art lately, so when thinking of a nail art design for Valentine's Day, my mind immediately went to roses. I've done a similar multi-rose print before, but this time I wanted to go a little more detailed and realistic with my design.


I started with China Glaze Bottoms Up on my thumb, ring and pinky nails and a simple black creme on my index and middle nails. Using a white creme polish, I freehanded on some irregular blob shapes over the black. Once that was dry, I filled in the white parts with Bottoms Up. While that was drying, I added the leaves using China Glaze Re-Fresh Mint accented by China Glaze Starboard and China Glaze Jolly Holly.

Once I finished the leaves, I went back to my blobs and started adding the details with Lime Crime Parfait Day followed by OPI I'm Indi-A Mood For Love. When everything was finished, I felt like the design was missing a little something, so I went back in with my white creme and the thinnest of dotting tools and added some white dots to the empty black space. To finish the design, I added a coat of Seche Vite to all of my nails.


I actually way prefer this rose design to my other one! I'm definitely going to have to experiment with some other colour combinations.


So, what are everyone's plans for Valentine's Day? Continuing with our tradition, David will be guest posting here with another of his hilarious manicures. If you haven't seen them, check out his 2012 post here and his 2013 one here.


Thanks for stopping by!

Monday, February 10, 2014

piCture pOlish Douceur by Tartofraises

I'm slowly working towards my goal of owning every piCture pOlish Collaboration shade. There's still quite a few I need to get my hands on, but one day they will all be mine. The one I'm showing you today is Douceur which was created in collaboration with the French blog Tartofraises.


Douceur is a nude-pink jelly base with fuchsia and magenta hex glitters and the classic piCture pOlish holo micro flakes.


Douceur was more opaque than I expected; my swatch shows just two coats! The formula was on the thick side and though it's not difficult to work with, I do advise patience during application.


I love that from afar, Douceur looks really delicate and muted, but up close you can definitely see that there's a lot going on with this shade. I know I say this about pretty much all of the piCture pOlish Collaborations, but this one is for sure another favourite of mine.


piCture polish Douceur is available from the piCture pOlish website as well as from other global network members such as Harlow & Co. and Nail Polish Canada. Be sure to check out their list of network members to find an etailer nearest you.

Friday, February 07, 2014

Herringbone & Studs - OPI Gwen Stefani Nail Art

OPI's celebrity partnerships have been some of my favourite collections over the years, so I was really excited when I heard they were collaborating with Gwen Stefani! I picked up the whole collection last week and was immediately inspired to use the shades to create some funky nail art. I'd also been saving this design by Manicurity in my inspiration folder for a while now so I thought these colours would work perfectly in this design.


I painted my thumb, index and pinky nails with OPI Over & Over A-Gwen, which is a rich classic red creme. It's not the most unique colour, but I don't think a Gwen Stefani Collection would be complete without a great red, and this one definitely qualifies. It even comes in a collector's box with Swarovski crystals and studs. I didn't actually use the studs from the box in the mani because I have a weird thing where I want to save special edition items, so I just used some gold studs I bought from eBay.

For my ring nail I used OPI Love. Angel. Music. Baby, which is a shimmering gold with a satin finish. I added top coat to this nail in order to tie in with the shiny finish on the rest of the nails, but it's also gorgeous in its normal finish.

For the herringbone nail, I started with a base of OPI Alpine Snow. When that was basically dry, I freehanded on the herringbone pattern using a thin nail art brush and OPI 4 in the Morning, which is a shimmering black that also has a satin finish.


I'm really into the herringbone pattern right now so I think I'll have to experiment with using different/more colours and variations.


Thanks for stopping by! Have a great weekend!

Monday, February 03, 2014

Delush Polish XO Valentine's Day Collection - Swatch & Review

Just in time for Valentine's Day, Delush Polish is offering the XO Collection - a trio of romantic polishes that are sure to set the right mood for V-Day!


Je Ne Sais Quoi is a soft white crelly base with a mix of blue, pink and white glitters throughout. The glitters range in size and shape - there's squares, hexes and circles. It had a good, thick formula that covered nicely in three coats. I did have to do some fishing with my brush for the larger circle glitters, so keep that in mind during application.

This one is my favourite of the trio! I love the soft milky base and the beautiful rosy pink glitters. I think this could also work for a baby shower!


Lights Out is a crisp white crelly base packed with gold, priple, pink and green glitters. Again, the glitters range in size and shape. There's circles, stars and hexes. The base is more opaque than I expected so it's easy for some of the glitters to hide away when they're covered with a new coat. This one also had a nice, thick formula. The hot pink start glitters were plentiful and I didn't have to fish at all to get an abundance of those, but I did have to fish for the larger purple circles. I've shown three coats here, but you could definitely get away with two.

This one is interesting to me because it somehow manages to be both a colourful glitter bomb, while still remaining soft and delicate. I'm impressed.


Make Me Blush is a very light blush pink with golden shimmer. The formula applied great, though it was a tiny bit streaky on the first coat. I used three coats in total here, but you could get away with just two.

Make Me Blush is very delicate and feminine, and definitely office appropriate. What I like about it personally is that it's so delicate that it almost borders on nude, which I find actually works better with my skin tone. I definitely don't have any pinks quite like this in my collection.


I should also mention that with Delush Polish orders you get a fun scratch card! Mine gives me the opportunity to name a new Delush Polish shade, which is pretty darn cool.


My first experience with Delush Polish was definitely very good and I hope to try out more shades from the brand in the future!

You can find the XO Collection and other Delush Polishes from the online store here. You can also follow the brand to keep up with the latest news and collections!

Tuesday, January 28, 2014

Introducing piCture pOlish Tail Feather by Kayla Shevonne!

Oh em gee, this moment has been a LONG time in the making, but I can finally introduce to you my very own collaboration shade with piCture pOlish!


As you all must know by now, piCture pOlish has been working with bloggers to create collaboration shades for well over a year now. After the 2012 Blog Fest, piCture pOlish chose a number of bloggers to create their own unique collaboration shade and I was lucky enough to have been chosen. And ever since, I've had to keep this collaboration a secret, which let me tell you was no easy feat! So I've been keeping this secret since September of 2012! 2012!! But I can say without a doubt that it was definitely worth it.

Honestly it's so surreal to see my name on a bottle of internationally sold nail polish. And it's not just something with my name slapped on it, this is something that I designed, from the name, the tagline, right down to the very last shimmer particle! What an amazing feeling!
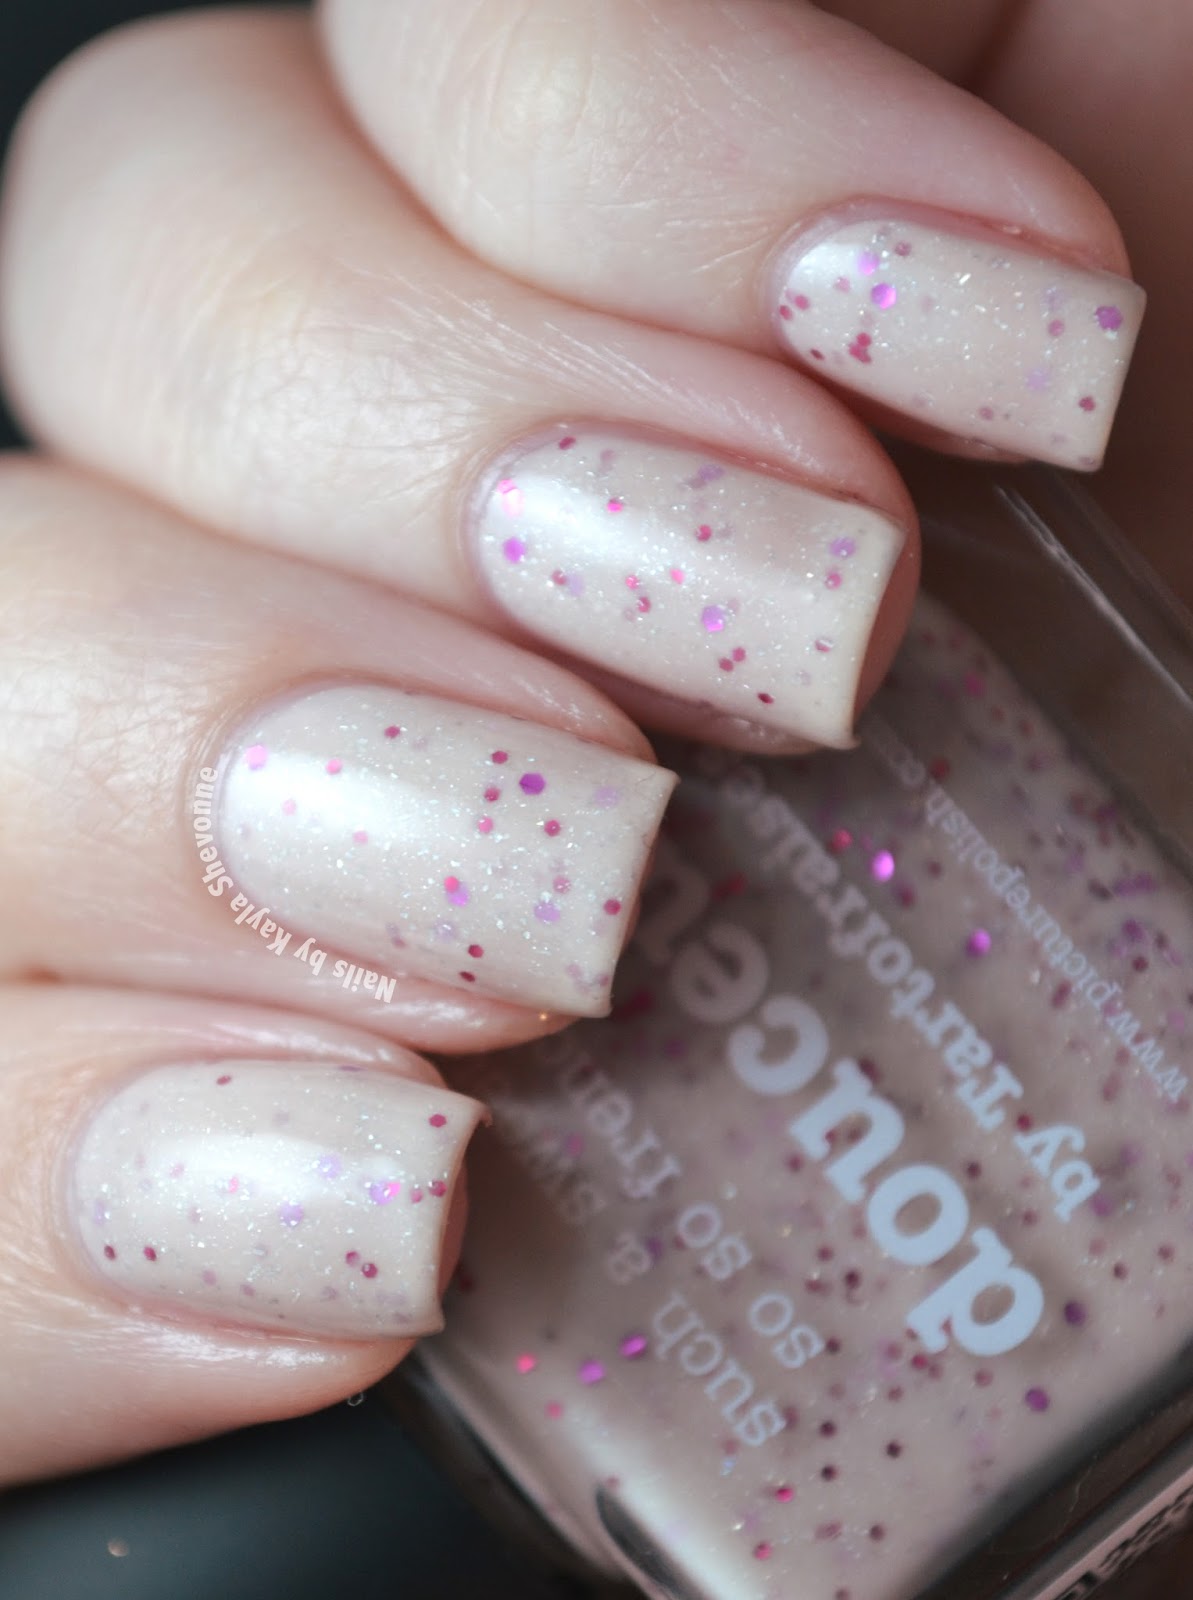
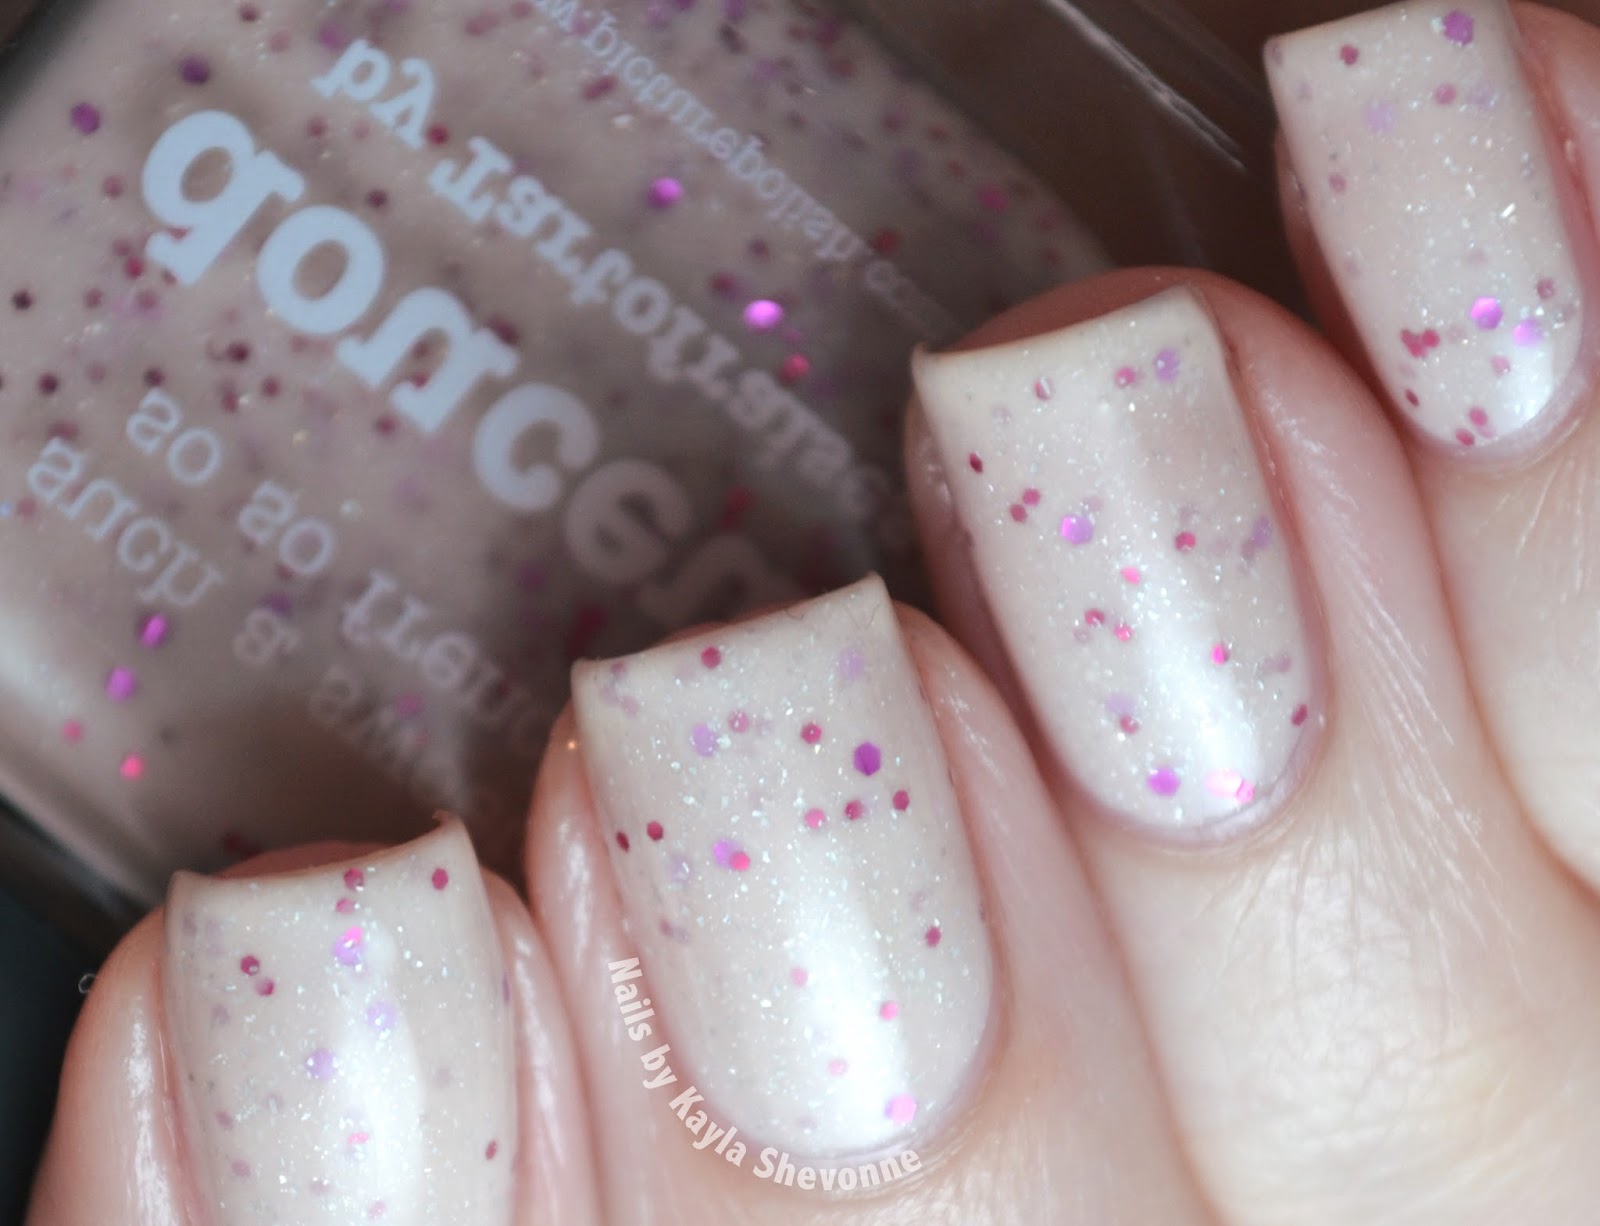
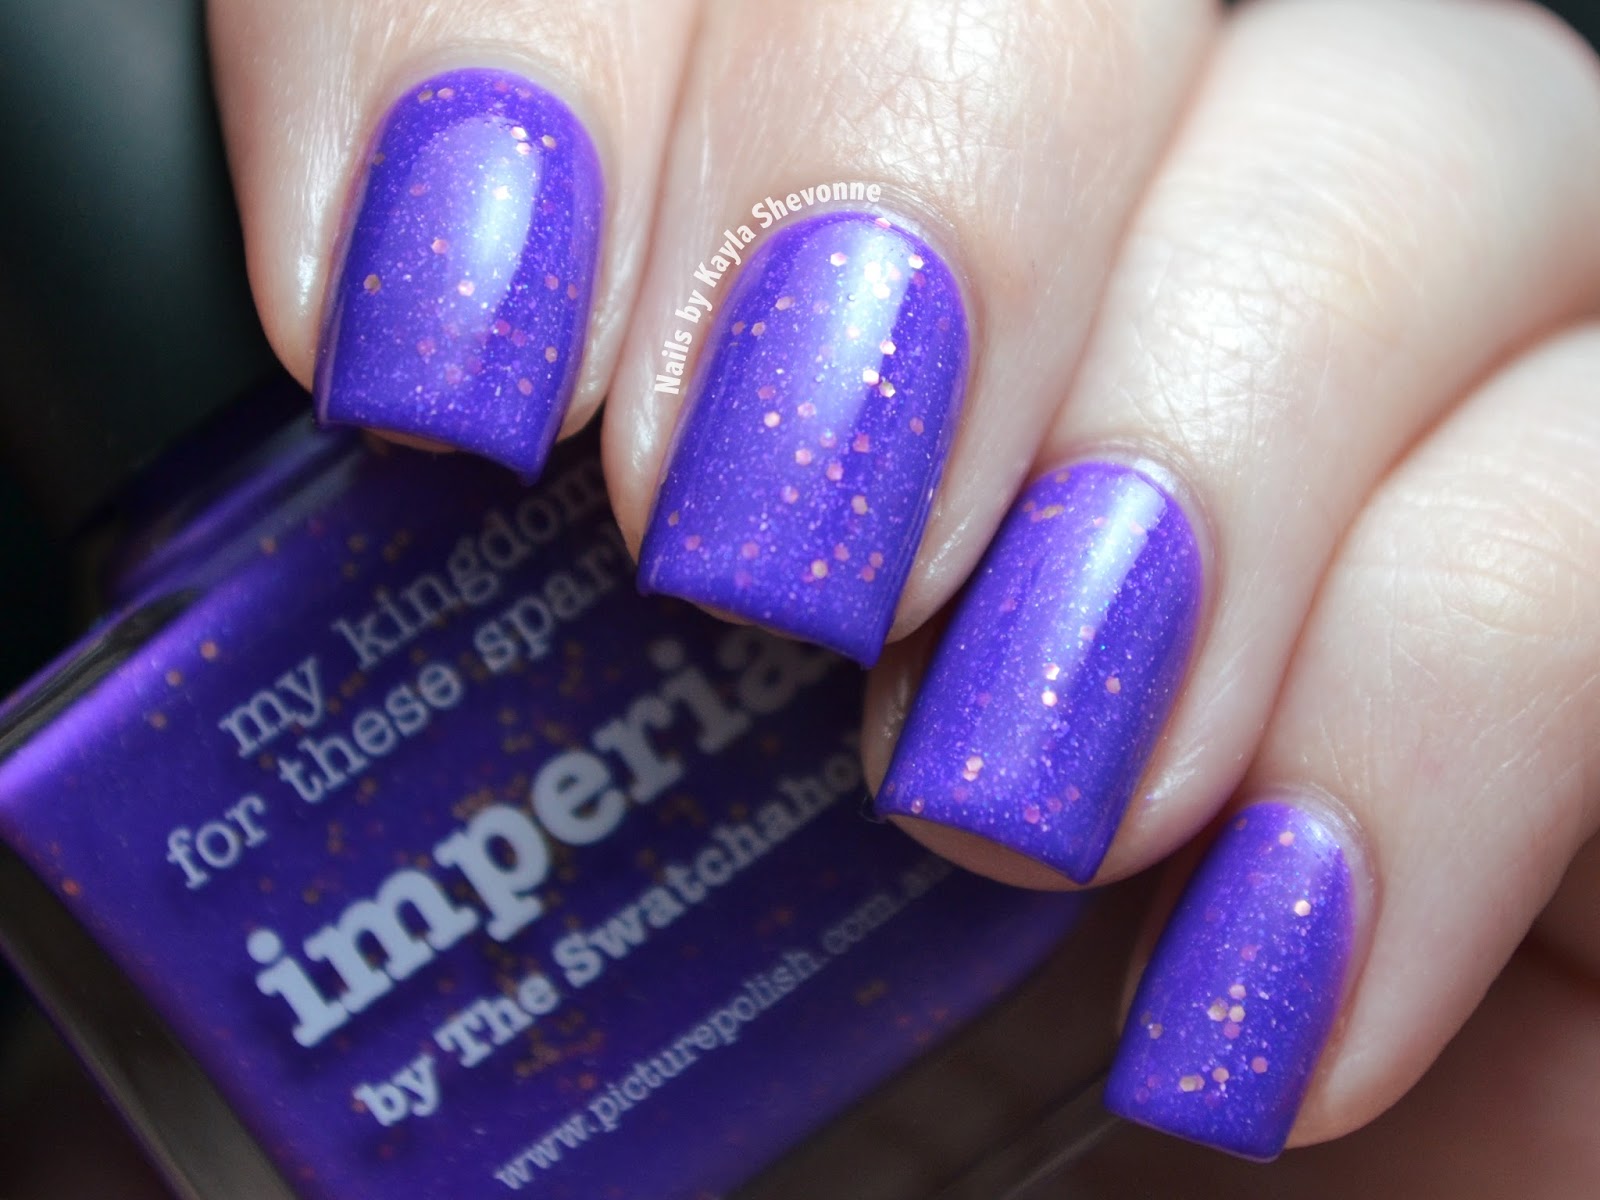
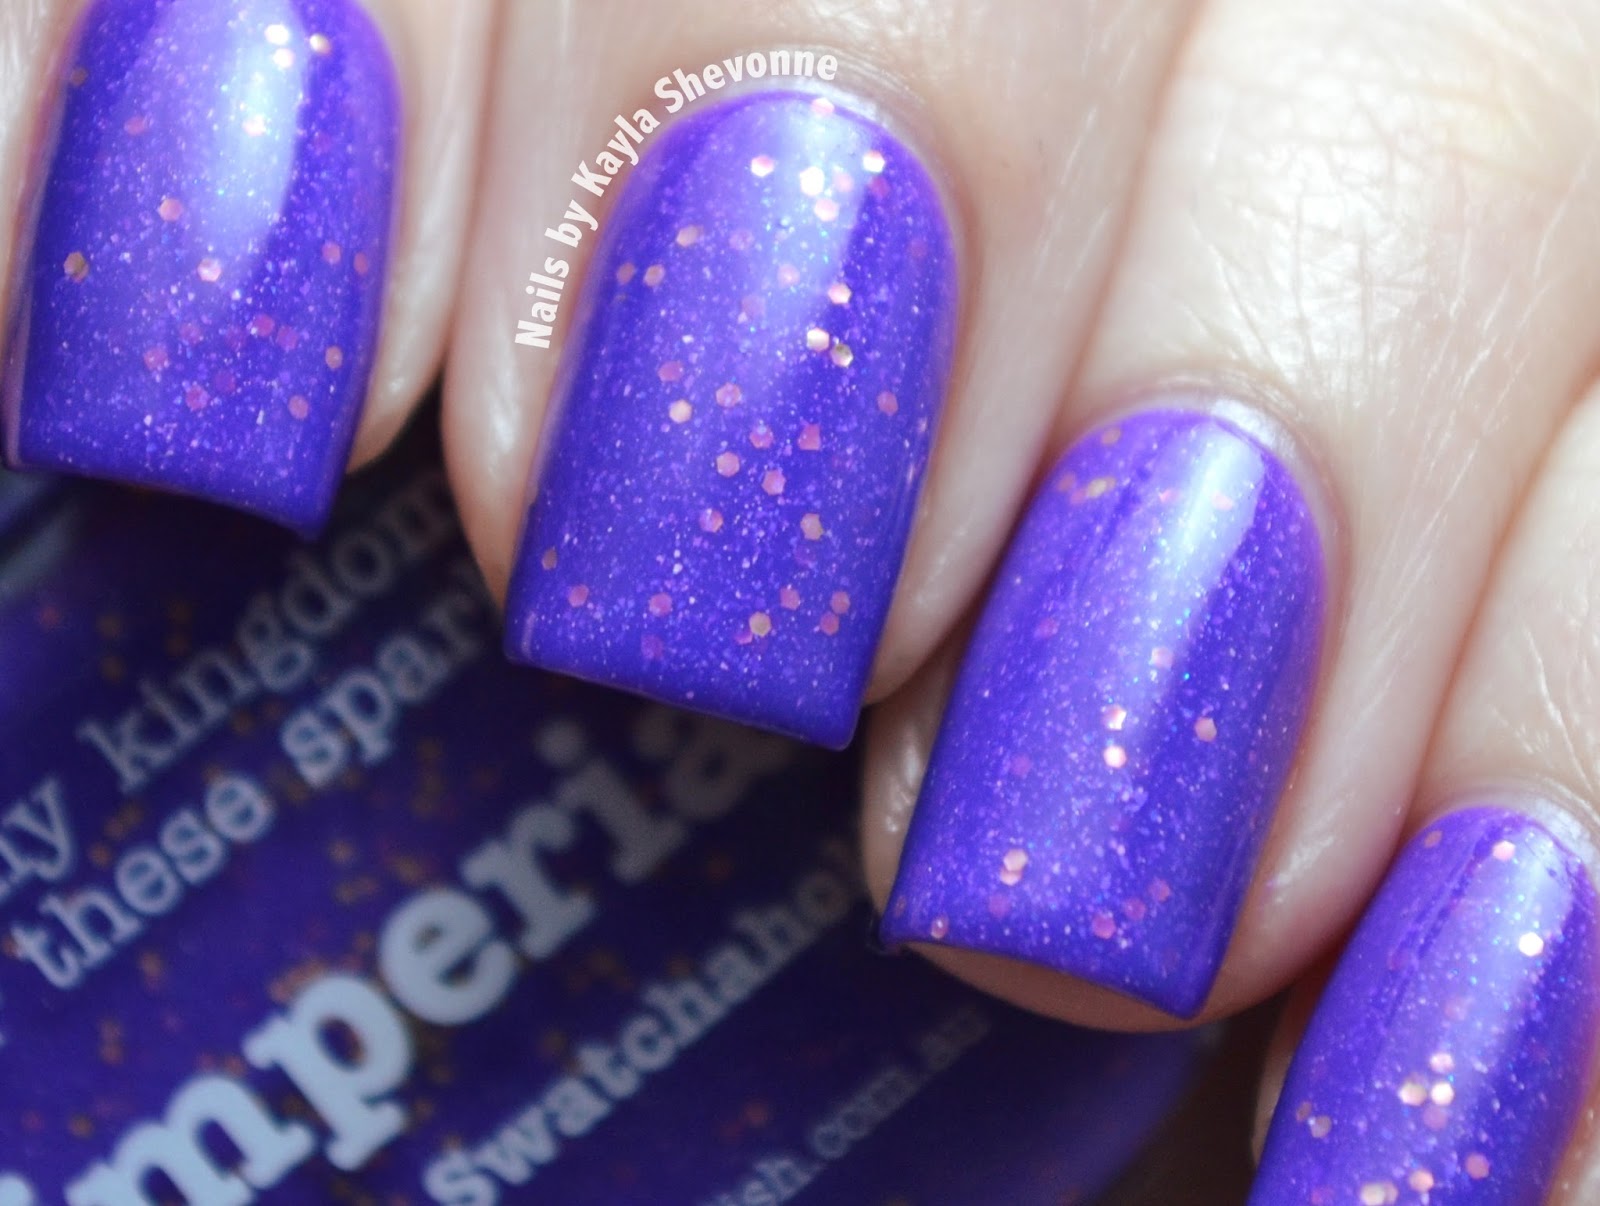
Swatches...!


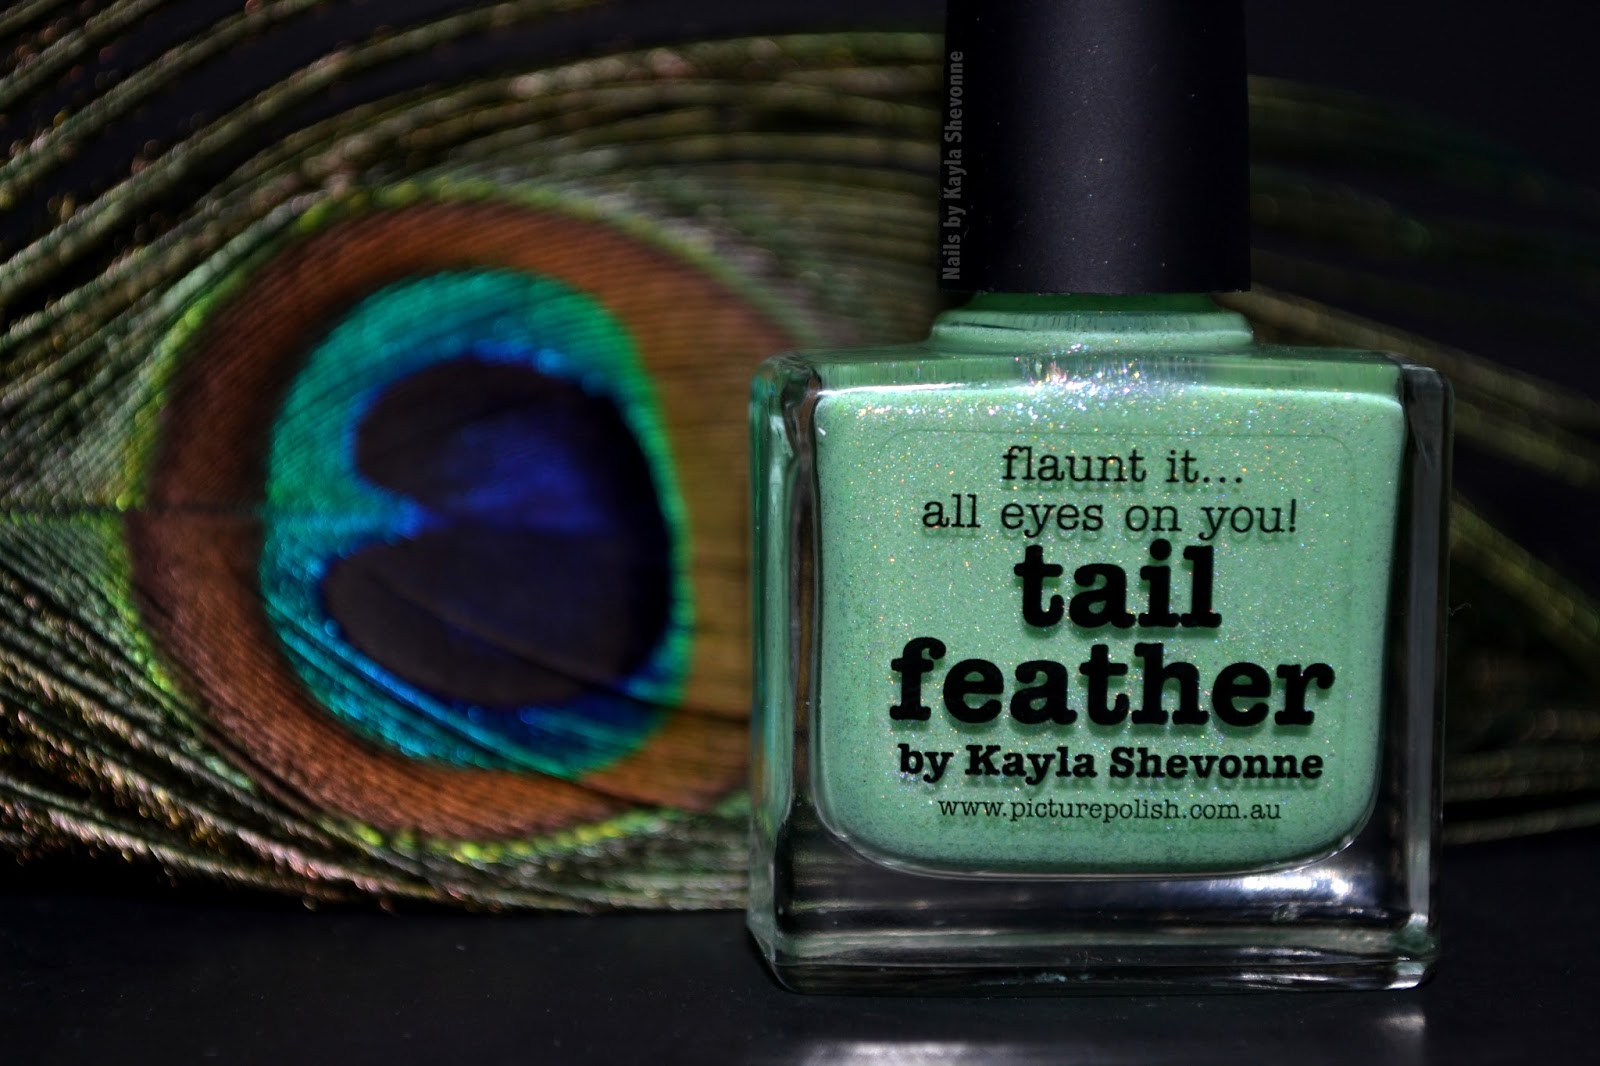
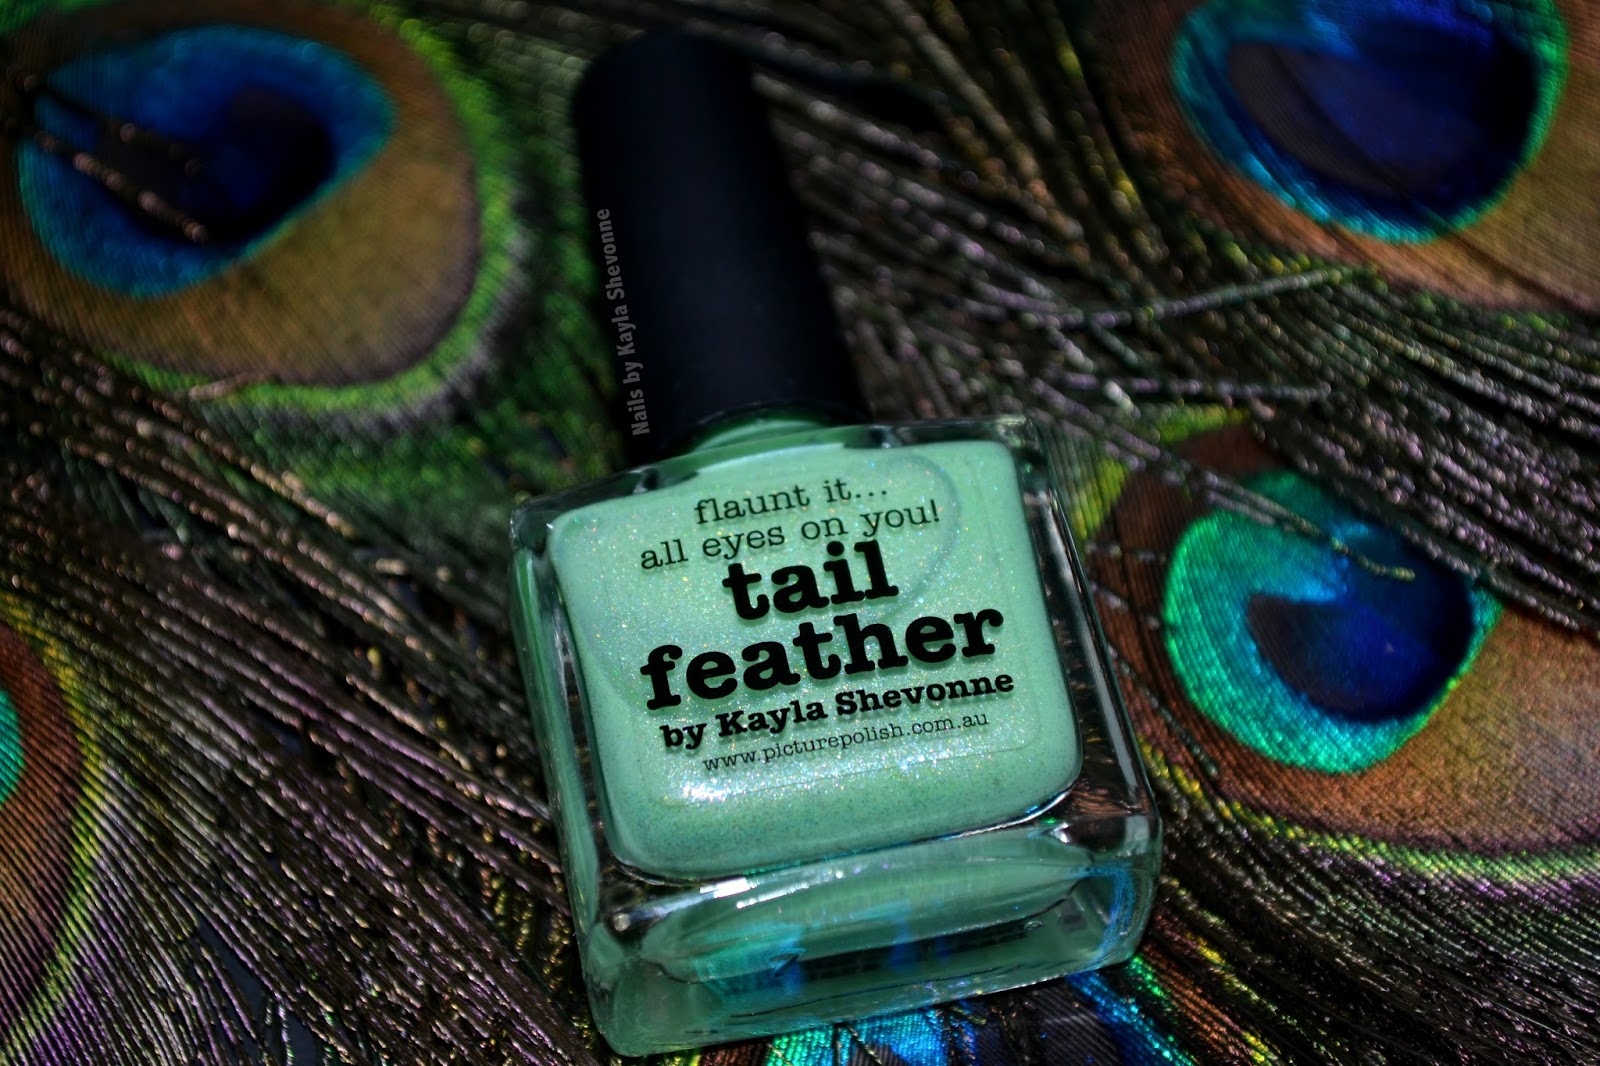
If you've been reading my blog for a while, you'll know that I have a love for all things peacock. I even had a peacock themed wedding! So when asked to describe my perfect nail polish, I knew right where to start.


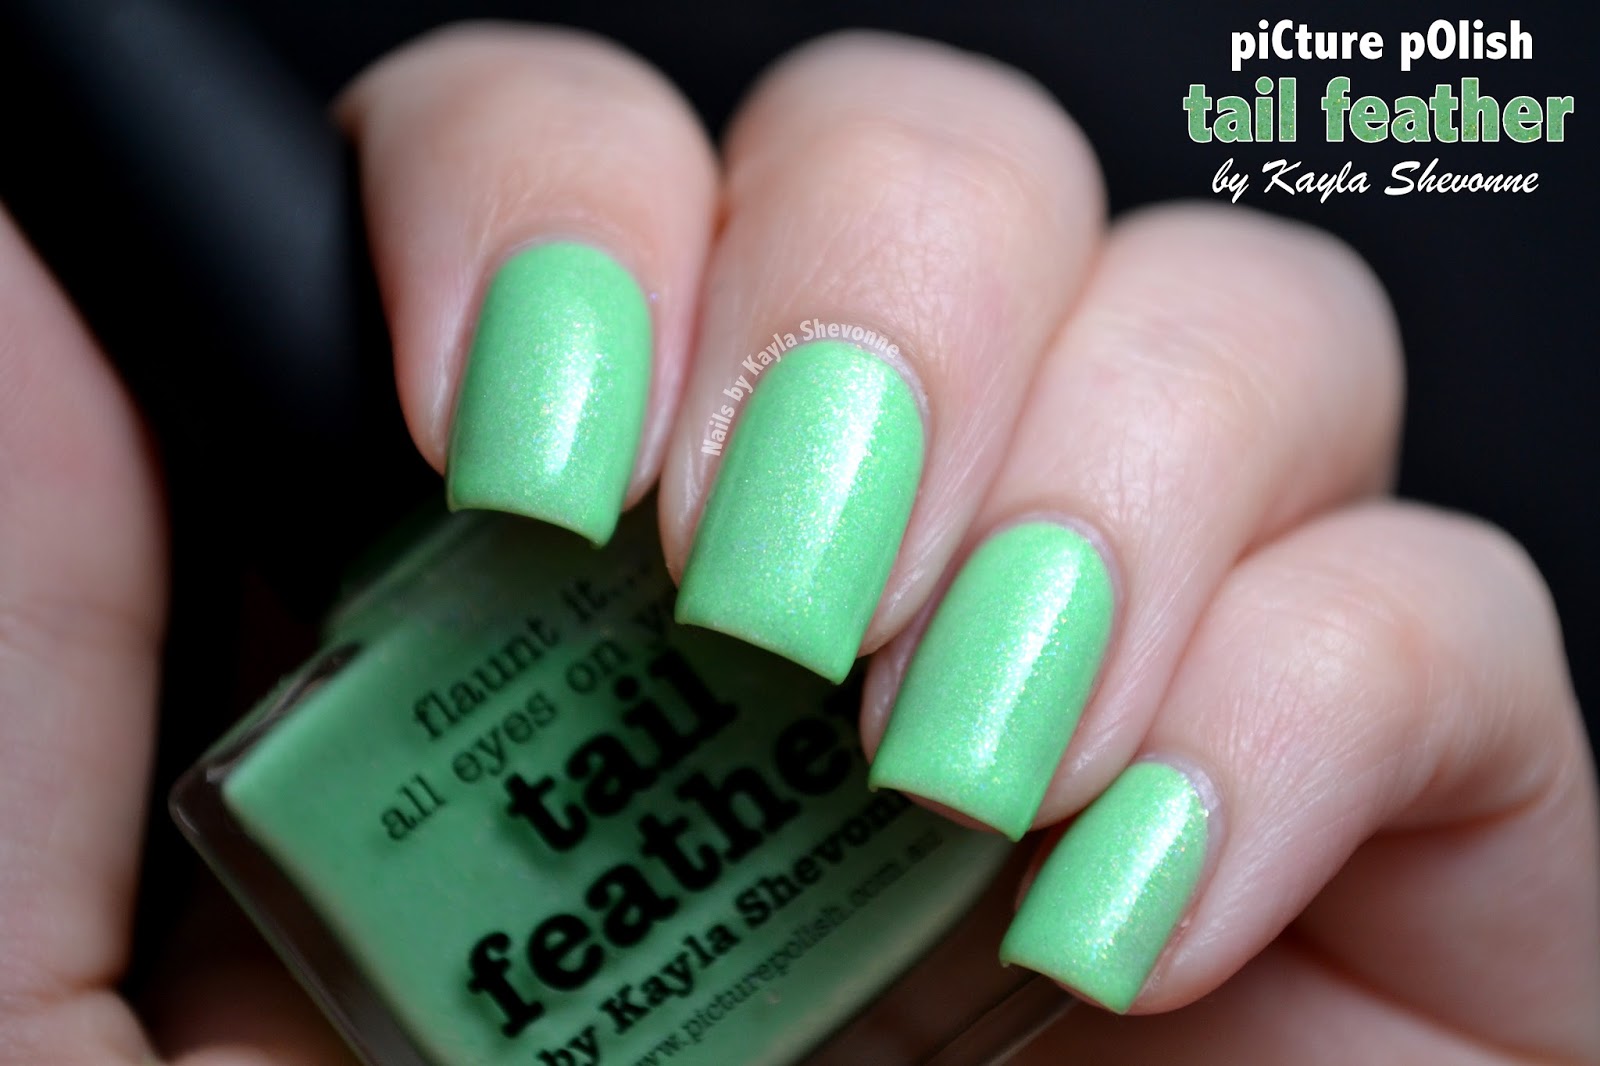
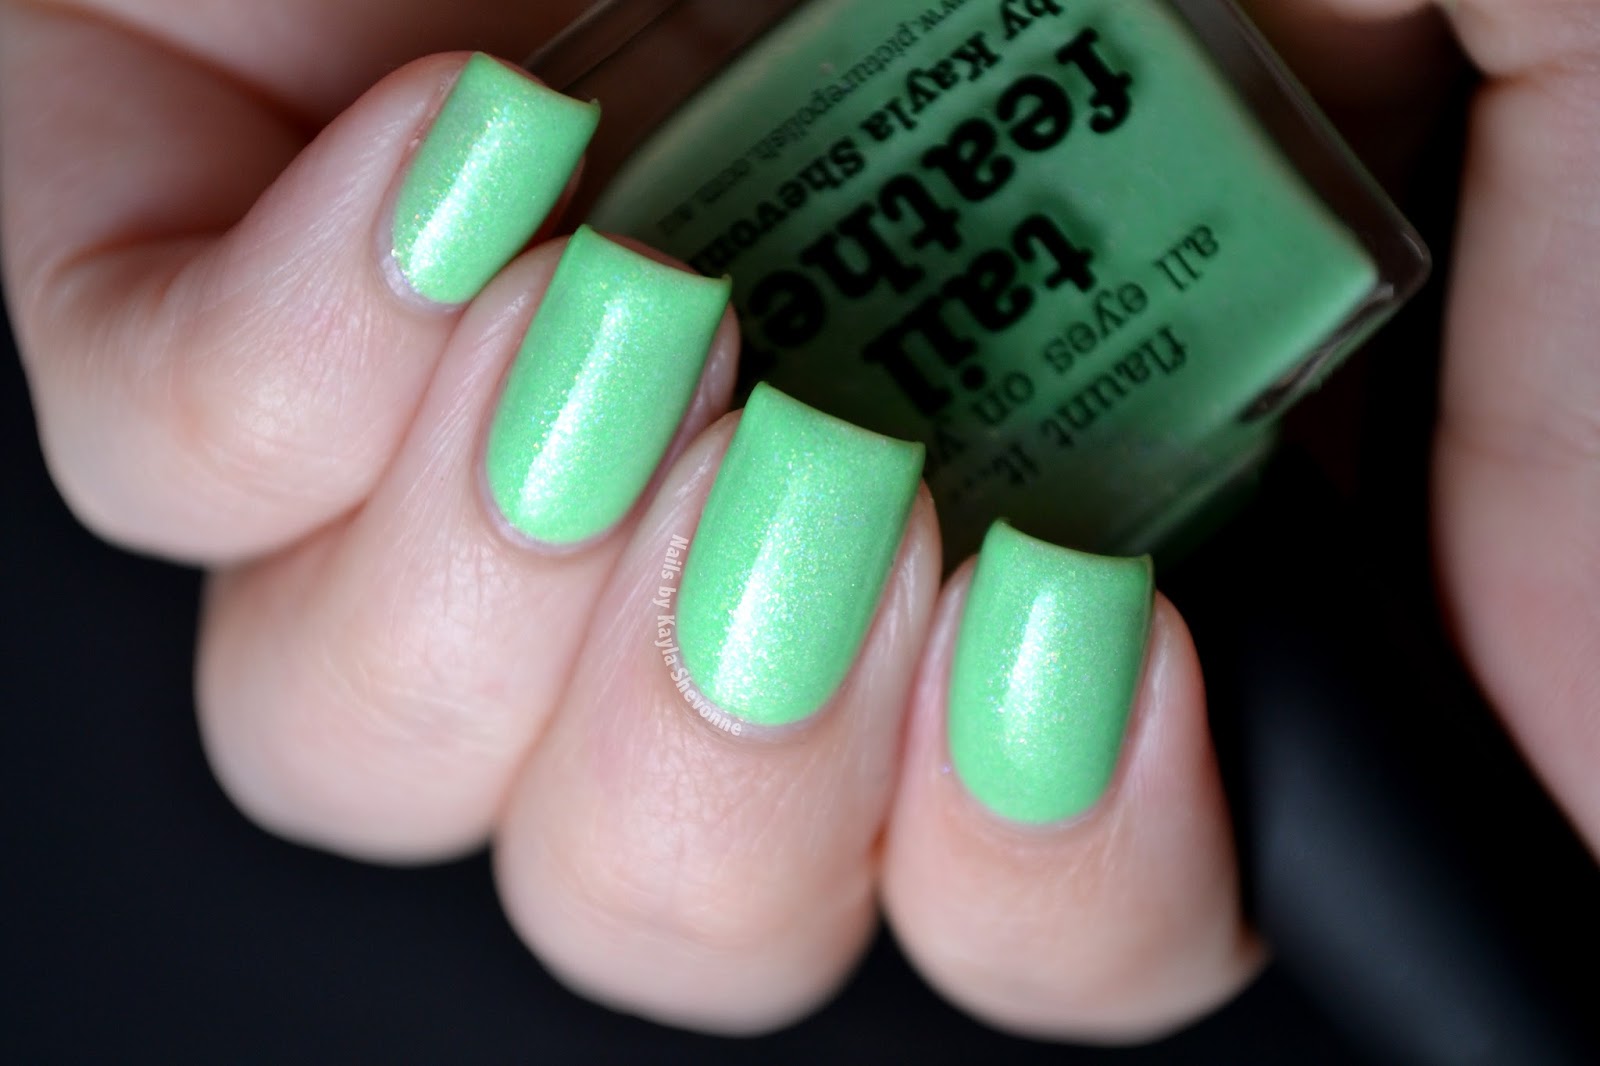
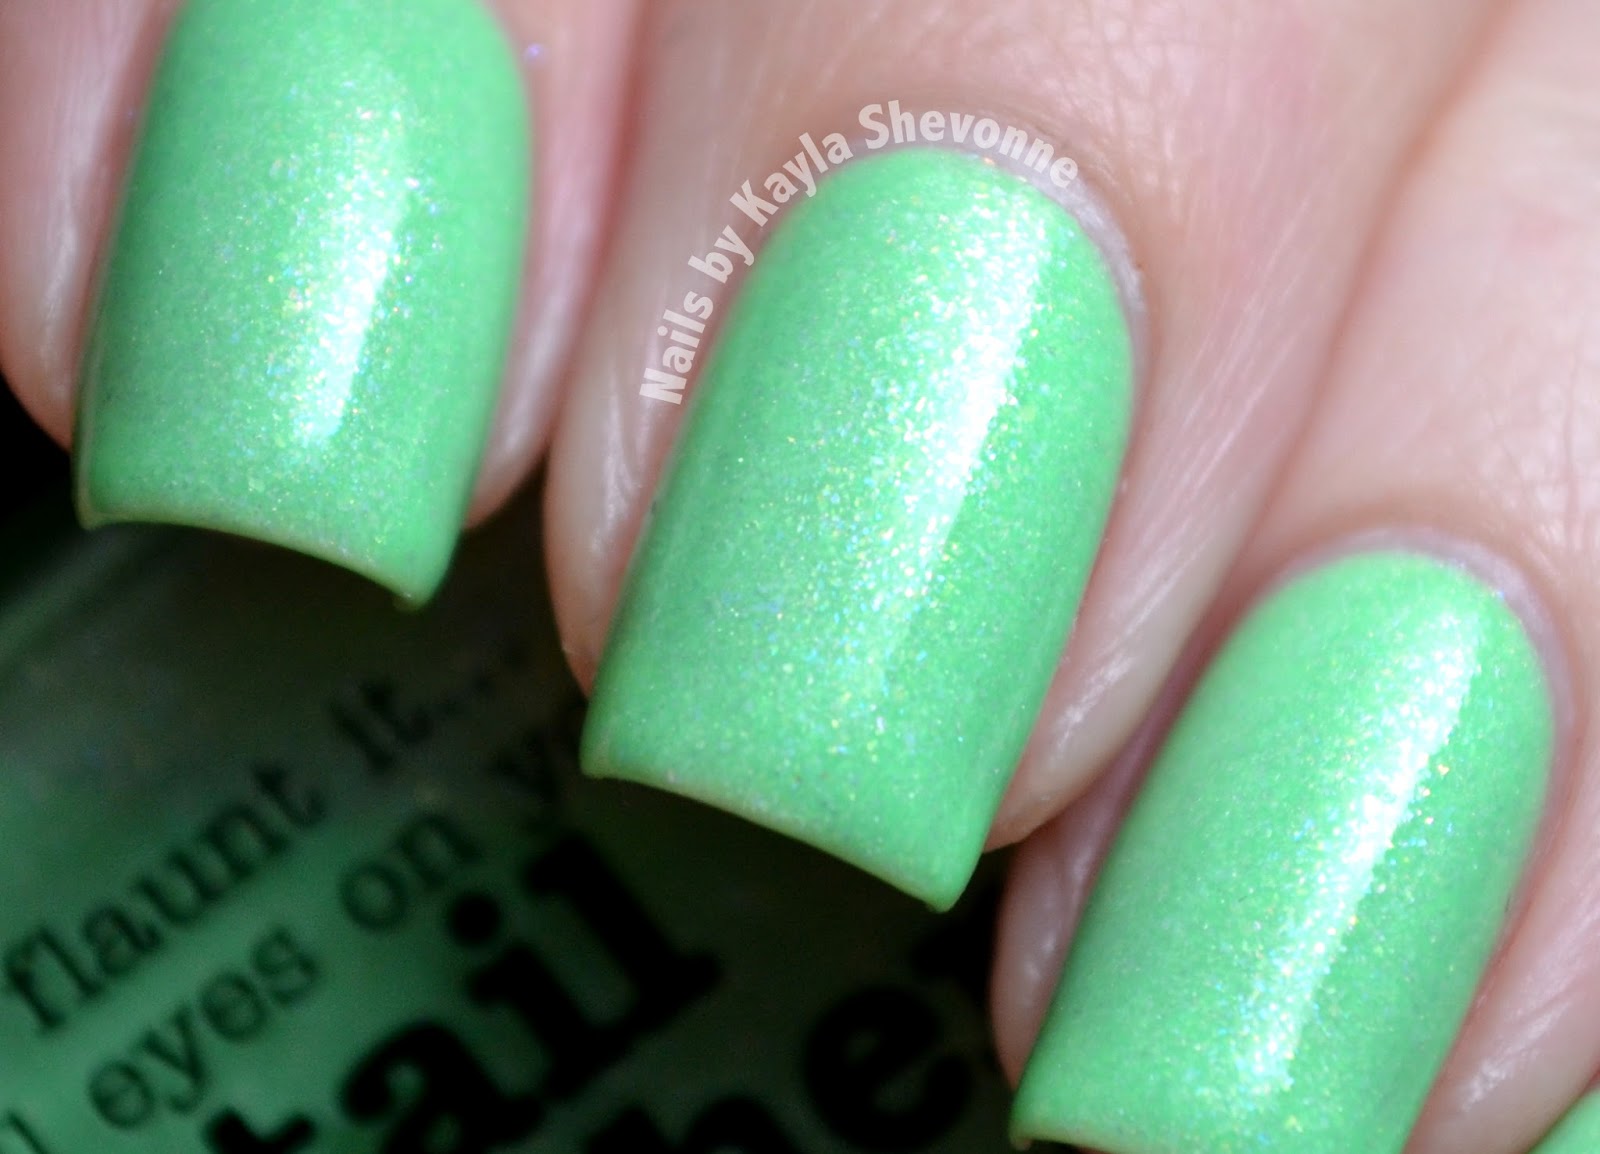
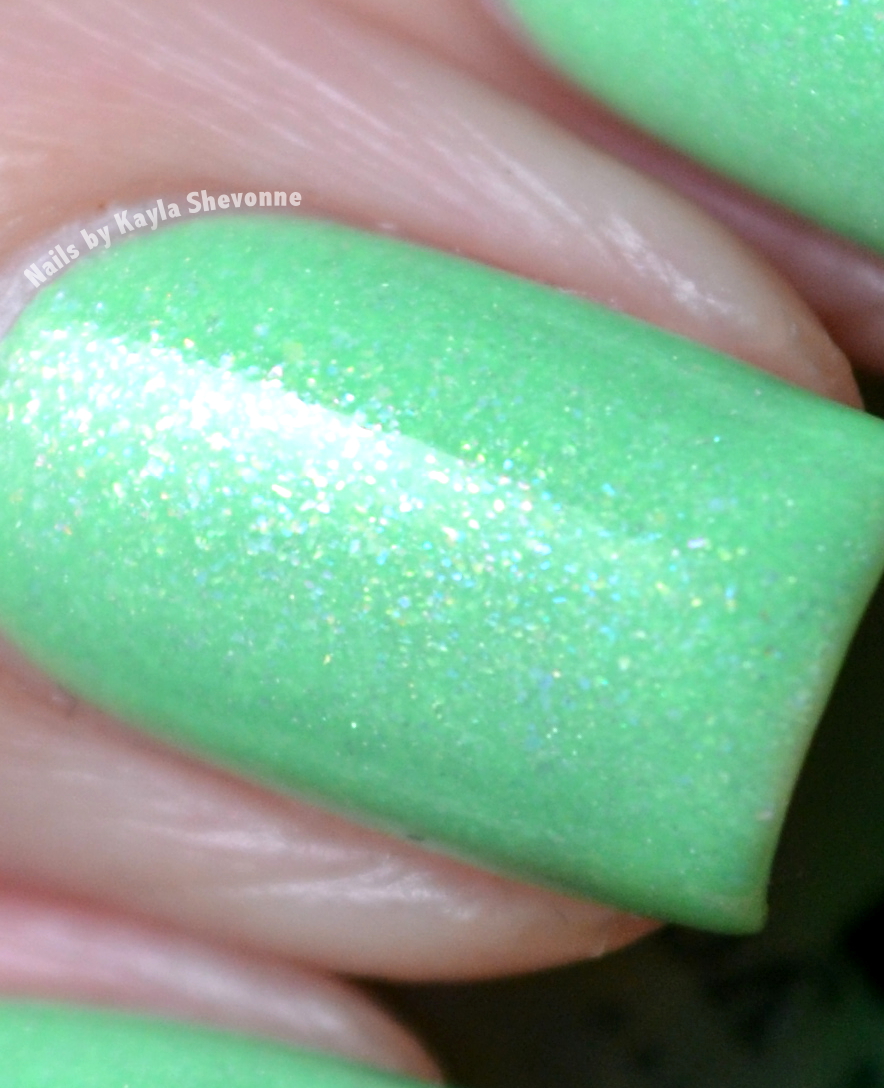
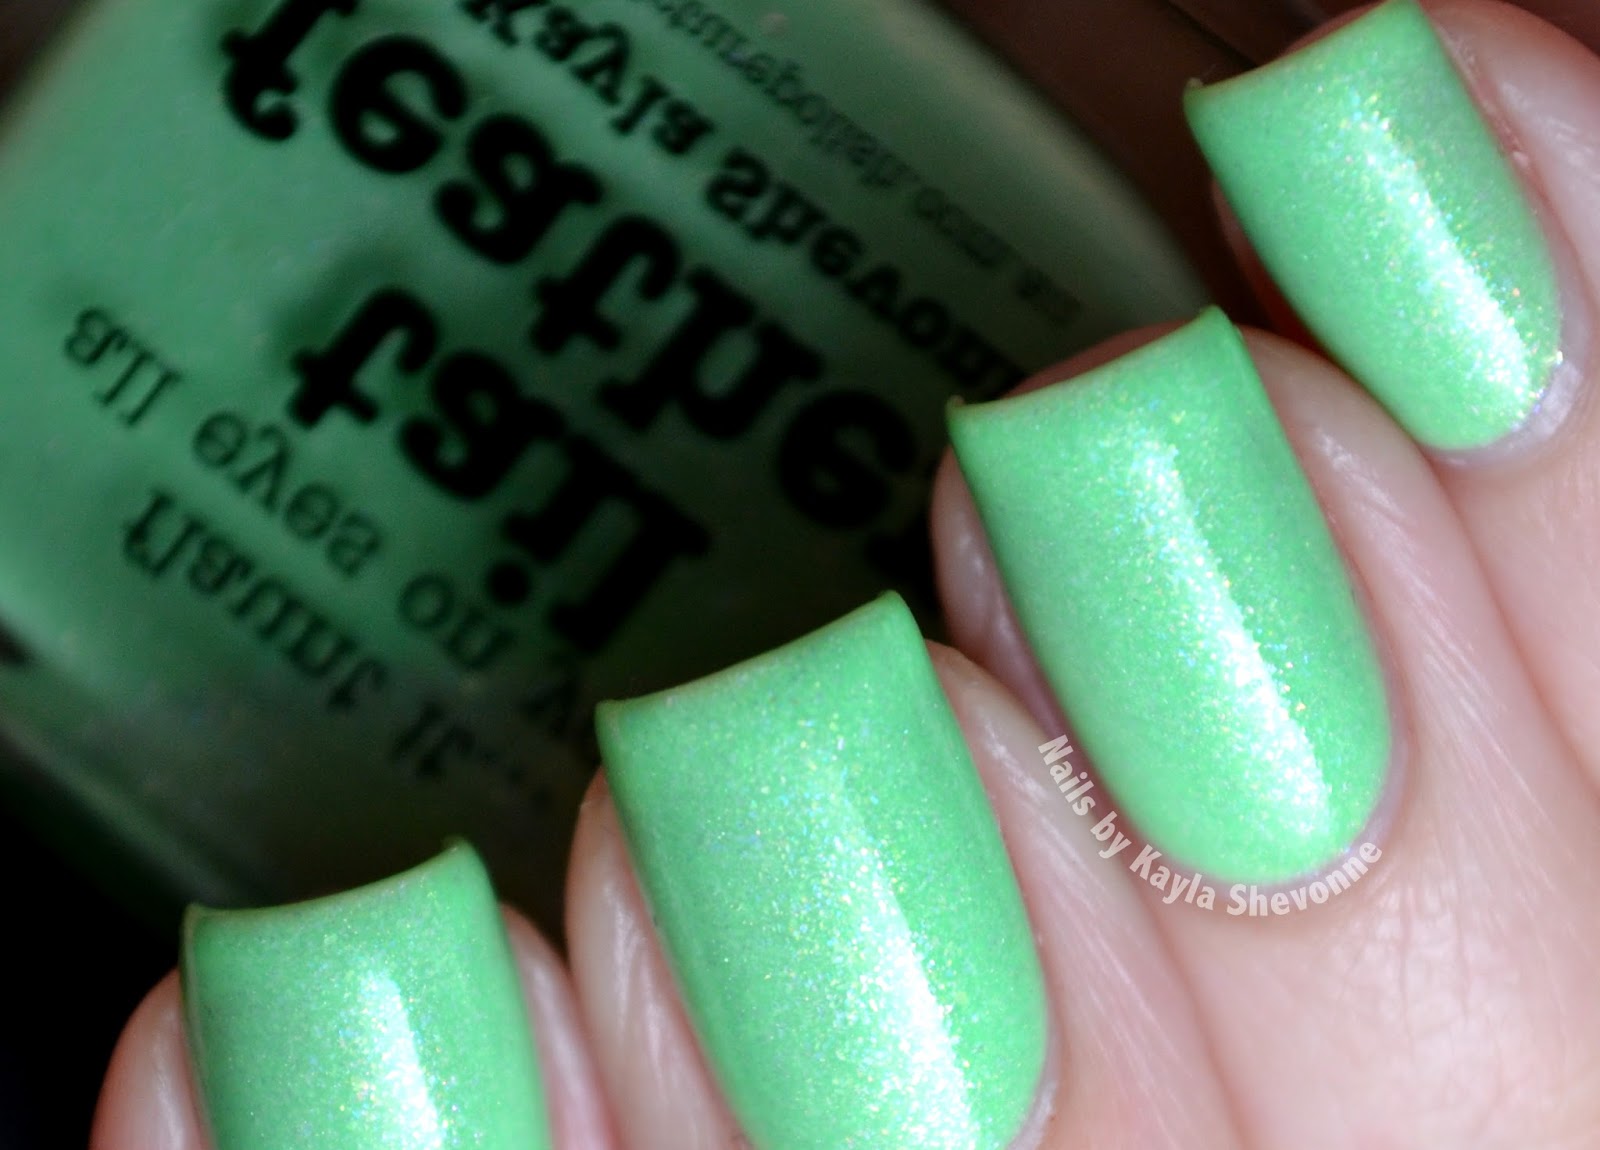
Tail Feather is a bright, borderline neon shade of green that's packed with lots of blue, purple, pink, green and gold shimmer. The shimmer isn't your typical shimmer, instead each particle is like a tiny micro-flake. The piCture pOlish gals called them "sparks" and I think that's the perfect description!


The shimmer particles I chose to use lend to a thicker polish formula, and I'll admittedly advice patience during application, but the colour is so worth it in my opinion. I've used three coats in my swatches here.

I should also mentioned that piCture pOlish has moved from a 3 free formula to a new 5 free formula and Tail Feather is among the first of the shades with the new formulation!


Here's my official inspiration story that I gave to piCture pOlish:

I was inspired by the exquisite radiance of a peacock's display. Furthermore, I've always been personally drawn towards bright and fun tropical colors. I combined both of these ideas, along with some brilliant eye-catching shimmer, to get my shade, Tail Feather!


The tagline was something I struggled with. I couldn't get that Nelly, P.Diddy and Murphy Brown song "Shake Ya Tailfeather" out of my head, so my mind kept going to the lyric "pop something, move something, shake ya tail feather". But I knew I didn't want that (plus, copyright infringement, anyone?), so I had to force myself to not think of that song, which was a lot harder than it sounds!

Luckily, my amazingly clever and always witty husband (don't tell him I said that, it'll surely over-inflate his ego) swooped in to save the day with what turned out to be the perfect tagline - "flaunt it… all eyes on you!". If you think about it, it's actually a double entendre! All eyes are on you because the polish is so gorgeous, but also, all "eyes" are on you, you know, the eye of the peacock feather! Genius.


I of course must thank the amazing women over at piCture pOlish. It's been such a pleasure to work with them so closely over this last year and a half. Thank you girls for making a dream come true!

Tail Feather is available now from the piCture pOlish website as well as from Nail Polish Canada. It will also be available soon from other international retailers such as Overall Beauty, Harlow & Co. and llarowe, to name a few. Be sure to check out their list of network members to find an etailer nearest you.

I hope you all love Tail Feather as much as I do! If you get yourself a bottle, be sure to share your photos with me! All of my social media info is available on the menu bar at the top of the page, so share, share, share!

Friday, January 24, 2014

Shadowed Rose Nail Art

So I feel like I owe you all an explanation regarding my recent absence.

If you you probably already know, but I started a new job last Monday! It's the first real, grown-up person job that I've had since earning my degree, so I'm obviously taking it very seriously and it's taking up a lot of my time, which is why blogging has kind of fallen to the wayside these first couple of weeks. However I'm slowly easing into this new routine and figuring out a new schedule for blogging.

In the meantime, I'd like to take a moment to thank each and every one of you who has stuck by me through my blogging gaps recently. First it was the wedding preparations, then of course the madness of the Christmas season, and now with the new job. It's so amazing to know that you all still support me and my little blog.

Anyways, let's get to the manicure!


The jelly gradient technique I used for the base of this design came from my friend Rebecca from Rebecca Likes Nails. She did a quick tutorial here if you'd like to learn how to recreate the look. I also used this technique in another mani back in July! Check that one out here.


The colour I started with is China Glaze You Drive Me Coconuts and then I followed Rebecca's tutorial and used China Glaze Isle See You Later to create the gradient effect. Next, I used a small nail art brush and China Glaze Liquid Leather to outline a rose shape on each of my nails. I must admit, it took a few tries on a practice wheel to get the shape looking how I wanted it to. I actually did some googling to find a good rose outline inspiration and I came across this image from a NAIL IT! tutorial, so that's the basic shape I went with.


I really love how these nails turned out! I think I'll definitely be using the shadowed rose shape in more manis in the future.

Thanks for stopping by!

Tuesday, January 21, 2014

New Year's Eve Nails - Better Late Than Never!

A little slow on posting these, but here's the super quick and easy mani I wore for New Year's!


The base for the polka dot nails is China Glaze Liquid Leather and I followed that up with some simple polka dots using a couple of different sized dotting tools and China Glaze White on White. The blingy accent nail is a base of China Glaze Midnight Kiss followed by two coats of China Glaze Blonde Bombshell. I topped everything with a coat of Seche Vite and voila!


We're actually not big celebrators of New Year's, we're much more into Christmas, so we didn't do anything special on New Year's Eve. But my nails were special enough, I think. :)


Thanks for looking!

Tuesday, January 07, 2014

Review & Swatches - butter LONDON Double Take Ice Duo

Hey!

Not too long ago I showed you one of the two duos that butter LONDON released for Holiday 2013. The first one is the Fire Duo and the one I'm showing you today is the Ice Duo. Each set features two polishes - one that acts as the opaque base colour and one flakie glitter topper that can be added to create a whole new manicure.


Bluecoat is a deep blue base with lots of electric blue shimmer. The formula was very good and Bluecoat is a very opaque shade. You could probably get away with one thicker coat, but I did two thinner ones to keep it more even looking.


Leccy is a flakie topper that consists of opalescent flakes that shift from blue to purple to even gold. The flakes are slightly sparse so I recommend applying one coat as normal but then using the brush to just dab on a few extra flakes in any bare areas. Apparently "Leccy" is brit slang for electricity, which I think is a pretty neat fact.


butter LONDON polishes are available direct from them (US site/Canadian site/UK site), or you can also get bL from Nail Polish Canada, who is currently offering free shipping on ALL Canadian orders so it's a great chance to stock up on some bL shades if you're in Canada!

Thanks for looking!

Friday, January 03, 2014

piCture polish Imperial by The Swatchaholic

We're in the middle of a crazy blizzard here and although there's been rolling blackouts for the last 24 hours plus, I've been fortunate enough to not have lost mine yet! So there's really no better time to swatch new and pretty polishes!

Recently I placed a small order with Nail Polish Canada for a couple of piCture polish Collaboration shades that I'd been wanting. Imperial by Jeanette from The Swatchaholic was one of the ones I picked up.


Imperial is a vibrant neon people base packed with heavy blue shimmery flakes and small coppery gold hexagonal glitters. Pictures can't do this one justice because it's even more vibrant and beautiful in person. Definitely a must-own in my opinion.

The formula was pretty great; it was nice and creamy and two coats provided perfect coverage. It does dry down semi-matte due to the neon pigment, so be sure to add top coat if you want a shiny finish.


If you'd like to know more about the inspiration behind Imperial and see some of Jeanette's beautiful photos, check out her post here.


Imperial is easily one of my favourite piCture polish Collaborations ever. In fact I'm glad that I tried it before finishing my editor's choice post featuring my Best of 2013 picks because this will definitely be making the list.

piCture polish is available now from the piCture pOlish website as well as from other global network members such as Harlow & Co. and Nail Polish Canada.

Wednesday, January 01, 2014

The Best of 2013 - Reader's Choice

Happy New Year's everyone! I hope you all had a happy and safe New Year's Eve!

This post took a whole lot longer than expected to put together, but I finally have the results from the Reader's Choice Best of 2013 Survey! I'll announce the winner of the corresponding giveaway at the end of the post.

Let's get right to it! Here are your choices for the best brands, products and trends of 2013!

  • Labels